Thursday, May 02, 2013

Photo 1 Portrait Assignment

Digital Photography: Portrait Assignment


You will shoot portraits over the next week on Tuesday May 7th and Thursday May 9th.
One day you will shoot at school using the lights in the studio and the other day you will shoot off-campus at a predetermined location. 
You will shoot AT LEAST 24 pictures of your subject each day (most of you will shoot between 50 and 75 pictures.
You can, and probably should, take pictures on the weekend as well.

1. Find two interesting human subjects. The people you choose should WANT to be in the picture and they should be willing to cooperate. It's OK to work with people in this class.
2. Talk to your subject. What type of portraits do you want to create? Use colors or lighting to create a concept for your portrait. Costumes or uniforms work great. Imaginary ideas are OK. Choose an interesting setting based on your concept.
3. Change angles between shots. Shoot at least 24 pictures of each subject.
4. Use props if they will help the audience learn something about the subject.
5. Vary the lighting. Use filters, flashlights, lamps, or multiple lights to enhance your picture. Use the different lighting techniques that you will read about in class (see above).
6. Encourage different emotional looks. Pretend you are Austin Powers taking pictures. Tell your subject they are "groovy".
7. Having your subjects "pose" in action is just fine.
8. Most importantly for this assignment don't forget your compostion rules. Use framing, leading lines, rule of thirds, color contrast etc. to enhance your photo. Fill the frame.

Portrait HintsPart 1
Portrait Hints Part 2

More Hints

Even more hints


Here is a list of the different types of portraits photos you will turn in:

  • A Vignette Photo
  • A Grayscale Method Photo
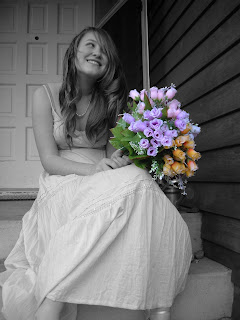
  • A One Item Kept in Color Photo
  • A selective Focus Photo
  • A minimally adjusted photo
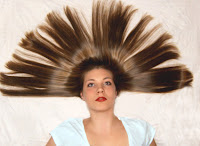
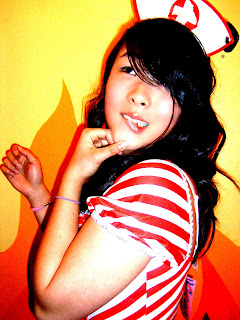
  • One WHACKY anything goes portrait (change the colors, use the liquefy tool, and make this as unique and interesting as you can)

Finally, you will turn in your best picture as well.
Lighting!!!
http://mrstorydigiphoto.blogspot.com/2011/12/different-lighting-techniques.html

Wednesday, May 01, 2013

Photo 1 and 2: Turning in HDR Pictures

On Thursday/Friday you will edit/Merge all of your HDR pictures.
You will then turn in your best four HDR pictures:
  • 3 Sunset/Sunrise pictures, each from a different location
  • 1 Object or Room HDR

Note:
Each Sunset/Sunrise HDR must show a sunset or sunrise. If you still don't have three different locations you can take pictures tonight or tomorrow morning.

Sunday, April 28, 2013

Indoor HDR Photography: Room or Object


Indoor HDR Photography:
  • Pick an interesting object or room.
  • Arrange everything in your shooting area in a meticulous fashion. Keep only the objects you want and need.
  • Set up three to four lights around the object or room. Lighting is the key to this assignment. Use lamps, flashlights, and traditional light bulbs. If you can find colored lights that will make your picture even more interesting.
  • Take seven or eight pictures at different exposures.
  • Change angles around the object or room and do it again.


Thursday, April 18, 2013

HDR Homework For Photo 1 and Photo 2 over Spring Break

Shoot three or four sets HDR pictures at a minimum of three locations.
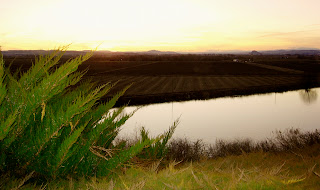
Shoot these pictures at roughly Sunrise or Sunset. Sunrise is at roughly 6:00 am and sunset is at roughly 8:00 pm.
You can shoot landscape or cityscape shots.
Make sure you have objects in the foreground, mid-ground, and background.


HDR Assignment for Photo 1 and Photo 2


HDR This is a new assignment for some of you and for others it's something you have done before. There are detailed instructions on how to create HDR pictures below.

I'll give you some hints:
1. Use a tripod or something else completely steady.
 2. Take 4-56 pictures using a variety of shutter speeds from almost dark to too bright. (Adjusting aperture only works also). Please use the snow, sun, landscape, action, firework, and beach settings etc. if you are using a camera that cannot manually adjust
3. Make sure tripod is completely steady.
4. Import pictures and put all the HDR pictures in a folder on the desktop
5 Merge pics in Photoshop using automate>merge>HDR


Step-By-Step HDR Instruction


Here

In the instructions above they suggest you change your shutter speed (I have successfully created HDR merges with aperture adjustment). I will recommend you try both. You CAN take HDR pictures using a point and shoot camera. Instead of adjusting the aperture you can try different settings for each picture like Beach, Snow, Clouds, and Sun etc.

HDR Pictures


Each of these pictures is actually three pictures combined, each with a different aperture setting.

Tuesday, April 09, 2013

Photo 1 Abstract Picture Assignment

Abstract Picture Assignment

You will take pictures nearby today school.
Thursday the 11th will be a shooting period.
You will need to shoot Abstract pictures this weekend as homework.

Please look at the links below for examples of abstract work.
Googled

Earth Photography

Photo.net

123rf.com


For this next assignment I want you to throw out all of the "rules" we've discussed in class this semester. This is your chance to be as creative as possible. I would recommend looking for patterns, colors, and shapes when deciding on pictures to take. Also try to take pictures of things you don't normally see in pictures.

Monday, April 08, 2013

Photo 1 Action Adjustments

 
You will adjust 18 pictures total.  Six of these pictures need to be Shorecrest related.
Here is what you need to do:
  • Six Motion Blur and Cropped Pictures
  • Six Grayscale Pictures using a variety of the Grayscale Adjustment methods
  • Six Adjustments of your choice: Anything goes as long as we can see the main action
    1. Please turn in the 18 adjusted pictures in a Contact Sheet called Action Adjusted CS.
    2. Turn in your best six as Jpegs in a folder called Best Six Action. Two must be SC related.
    3. Turn in your Best Picture for Printing.

Friday, April 05, 2013

Photo 2: Action Adjustments

You will adjust 24 pictures total. Here is what you need to do:

  • Six Motion Blur and Cropped Pictures
  • Six Grayscale Pictures using a variety of the Grayscale Adjustment methods
  • Six Pictures with Text Added: Who, What, Where, When, and Significance of event
  • Six Adjustments of your choice: Anything goes as long as we can see the main action
Please make sure you have turned in all three Action Contact Sheets. 

Turn in:
  • 24 Action Pictures Adjusted CS
  • 1 Folder with your Six Best Action Pictures Adjusted as jpeg files
  • Best Action Picture for printing   

Wednesday, April 03, 2013

Multimedia: SCNN Commercial

Your next assignment will be a 15-25 second SCNN commercial for anything school related. This could include a dance, a game, a club, an event, or anything else. Content must be related to the specific school related item.
All animation should look sharp and detailed.
Use school colors where appropriate.


Your animation needs to include:

  • Music AND sound effects throughout
  • Keyframe animation
  • Shape tween
  • Two Motion Tween
  • Two Movie Clips
  • Text that says either "SCNN" or the information for the school club, group, or event
  • Voices created by you using Garageband or other programs
Most of these projects will be between 200 and 400 frames each at 12 frames per second.

Multimedia: Flash Animation

90 Frames
  • One Movie Clip
  • One Motion Tween
  • One Shape Tween
  • Frame by Frame Animation
  • Detailed Background

Thursday, March 28, 2013

Quiz Review Questions


1. When one subject is in focus and the other object is out of focus in a picture it is called _________________________.

2. The composition element that suggests you should shoot subjects off center is called _________________________.

3. _______________________ gives your subject space to walk and/or look in a picture.

4. The __________________ is the device responsible for the amount of light that gets into your camera.

5. The _________________ controls the speed of the light entering the camera.

6. An F-Stop of F-22 means you have a _____________ amount of light entering the camera.

7. An F-Stop of F/1.4 means you have a ______________ amount of light entering the camera.

8. A shutter speed of 1/250 to 1/1000 is usually good for _________________ pictures.

9. A picture that shows two subjects with two distinct and different colors is an example of __________________ composition.

10. ______________ is the term used to describe the focus length from your camera to your subject.


11. To adjust brightness/contrast you go ______________ then _______________ then ____________________.

12. Layer Style and Layer Mask buttons are located in the ________________ ___________________.


All Photoshop short cuts:crop, clone stamp, patch, lasso, burn and dodge, text, magic wand, move tool, marquee tool, and brush tool etc.


]* selective focus
* macro
* Strive for a feeling of unity
* compose scenes around a single center of interest
* Lighting to emphasize a point or idea
* leading the subject
* the rule of thirds
* horizontal and vertical lines
* tonal balance
* balance mass
* abstract
* leading lines
* frame the central subject matter
* color contrast
* # of prime objects
*
Convey Meaning Through Colors and Tones
* movement


http://cybercollege.com/tvp023.htm
(start reading the above link at Strive for a Feeling of Unity)
http://cybercollege.com/tvp024.htm
(Look at further examples at bottom of page)
http://cybercollege.com/comp_ex.htm
http://cybercollege.com/tvp025.htm
http://cybercollege.com/comp_ex2.htm

Wednesday, March 27, 2013

Photo 1 and Photo 2 Shutter and Depth of Field Work

 
Shutter and Depth of Field Final

What I need from you today:

Part 1
Shoot three photos of the exact same action.
All three-action photos should be properly composed and interesting to look at. Move the camera around and experiment with different angles.
·     Photo one should be too dark
·     Photo two should be perfectly in focus with proper lighting
·     Photo three should be too bright

Again, the photos must be unique and interesting.

Part 2
Two exceptional composed shots of the exact same (interesting) subject from the exact same angle and location.
·     Photo one is in focus, well lit, and has a shallow depth of field.
·     Photo two is in focus, well lit, and has a large depth of field.

Wednesday, March 20, 2013

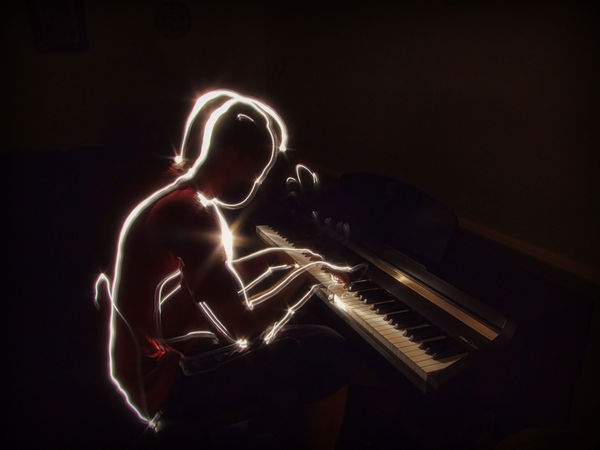
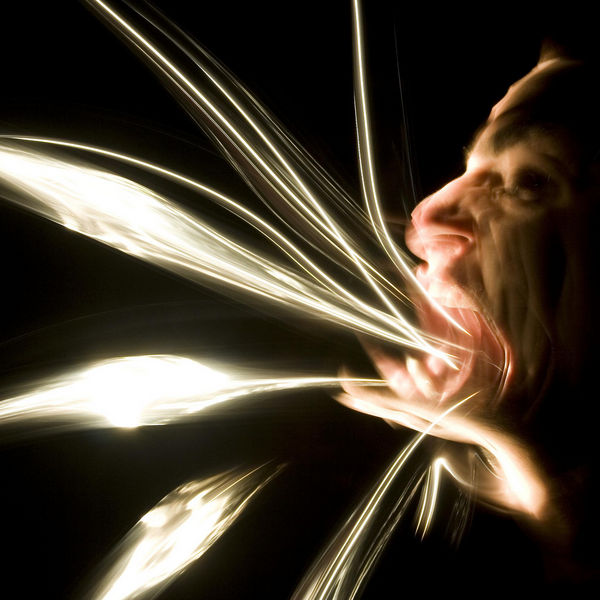
Photo 2: Light Painting

Light Painting

Slow Shutter and Light Painting Assignment


  •  
  •  Make lights move yourself. (Dance with lights etc.)Examples.
  • Landscape. (Sunrise or Sunset).
  • Cars.
  • Moving water.
  • Motion Tracking. (Zoom in, tripod helps).
Schedule:
Wednesday March 20: Shooting Day 1. Contact Sheet due at lunch.
Friday March 22: Shooting Day 2: Contact Sheet due at end of the period
Weekend: Homework. Contact Sheet 3

A video Tutorial on how to "Light Paint":

Tips on How to Light Paint [VIDEO TUTORIAL]


Image by gnackgnackgnack

Tuesday, March 19, 2013

Manual Adjustments and Action Photos

http://cybercollege.com/tvp012.htm
http://www.picturecorrect.com/photographytips/208/aperture_fstops_camera_settings.htm

http://en.wikipedia.org/wiki/Aperture
http://en.wikipedia.org/wiki/F-number


F-Stops and Shutter Speed Hints

Please take detailed notes in your own words on the top two reading assignment. You will using the material you learn this week on the cameras.

Camera simulator:
http://www.photonhead.com/simcam/shutteraperture.php

http://www.kamerasimulator.se/eng/?page_id=2

http://dryreading.com/camera/index.html

htthttp://camerasim.com/camera-simulator/

Schedule over the next two weeks:
  • Thursday is an Action Photo practice day at school. Bring a ball or other sporting equipment.
  • Action Practice Contact Sheet is due at the end of the period.
  • You will pick two after school action oriented activities or sports to shoot as homework. One must be SC related. You will shoot 75-100 pictures for each activity and turn in 24 picture Contact Sheets for each one.
  • Action CS 1 is due Monday the 25th of March.
  • Tuesday is another Action Practice day. However, on this day you can shoot with your fellow students off campus. You can go to a skate park, gym, or field.
  • Action CS 2 is due Thursday the 28th of March.

Friday, March 15, 2013

Photo 1: Grayscale Editing

  • Edit your pictures using a variety of grayscale methods. Make sure you save the abbreviation at the end of each adjusted picture.
  • Pick your top 24 Grayscale pictures. Try to pick roughly eight from each style: pattern, texture, and shadow.
  • Create a Grayscale Adjusted Contact Sheet with these 24 pictures. Turn it into the Staff Server.
  • Next, create a folder called Best Grayscale Pictures (with your name). Put your best six pictures in this folder as jpegs.
  • Finally, turn in your favorite Grayscale picture as ajpeg for printing.

Turn in Candid Pictures

Final Candid Editing

  • Select your top ten pictures.
  • Make sure the images you select show faces and emotion. Your ten pictures should show a variety of locations,composition styles, and subjects.
  • "Stalker" type photos will not be accepted.
  • Turn five of your pictures into Grayscale: I will review methods in class.
  • Edit five of your images any way you want. Fill the frame.

1.Turn in your best 10 Grayscale Adjusted.
2. Turn in your best 6 in a folder. Again, we should see a variety locations,composition styles, and subjects.   Did you notice the word variety in bold?
3. Finally, turn in your best picture for printing.

Photo 2: Candid Picture Rationale

Please read and review the links below. Take notes as necessary.
Open Text Edit on your computer.
Write a full 6-8 sentence paragraph explaining the rationale for choosing your best Candid picture. Use terms and references from the various readings below. Be specific with your examples. Tell me exactly where certain types of composition are located within the picture and tell me how and why they are effective.

http://photoinf.com/General/Geoff_Lawrence/Composition.html
http://cybercollege.com/tvp023.htm
http://cybercollege.com/tvp024.htm
http://cybercollege.com/tvp025.htm
http://cybercollege.com/comp_ex2.htm

Turn the written portion of this assignment into the Staff Server with your Best Candid Photo and call it Candid Rationale. Use the Naming Convention.
Turn in a 2nd copy of your Best Candid Portrait for printing. 

Wednesday, March 13, 2013

Garageband Assignment

Garageband Assignment #1
  1. Create a full-length song in Garageband that is 2-3 mins long – (to view time go to Control –> Show Time in LCD)
  2. The song should work for a specific genre of music as opposed to just random clips assembled together. For example, you should create a rock, country, or electronic song.
  3. The song should have distinctly different parts of the song (parts that are emphasized or de-emphasized or repeated).  "Real" music has verse, middle, and chorus sections.
  4. The song must contain at least 8 different tracks. Most songs will have have more than eight sections.
  5. You should include at least one sample, voice, or musical instrument
  6. You should include at least one instance of voice or real instrument
  7. At least 2 of the tracks must change volume multiple times throughout the song – click on the downward pointing arrow at the end of the track icons to make a track’s volumne fade in or out
  8. At least one track must include a segment that loops – usually created by clicking in the upper left corner of a region and dragging to the right.

Friday, March 08, 2013

Multimedia: Garageband Tutorials

Spend the entire period working through the various Garageband Tutorials listed below. Basically you need to become familiar with all of the features.
Please use headphones.
To record audio just use the computer microphone for now.
On Monday you will receive the Garageband assignment.

http://www.youtube.com/watch?v=HMuQchbJRG0

http://www.youtube.com/watch?v=tpUUKJeP7jE

Making a Drum Beat

Auto Tune

http://www.youtube.com/watch?v=dVp0X2BJYxw

http://www.youtube.com/watch?v=HMuQchbJRG0

Bass and Drums

Dubstep


Monday, March 04, 2013

Photo 2: Candid Editing

Please look at all of your Candid pictures and start editing your best 10 images.
Suggested adjustments:
Grayscale (multiple types)
Selective Focus
Duotone
Heavily Cropped

Homework:
One more Candid Contact Sheet due Wednesday.
Wednesday will be a shooting day.

Thursday, February 28, 2013

Photo 1: Shooting Patterns, Textures, and Shadows

12 Hints for shooting Textures

Five Hints for Black and White Photography

15 Black and White Photography Tips

How to Use Patterns in Photography


Your assignment over the next two weeks is to shoot:
  • 24 pictures involving man-made shadows 
  •  24 other images with shadows from natural light 
  • 24 pictures that emphasize patterns


  •  
     

Wednesday, February 27, 2013

Candid Assignment for Thursday

Read these tips:

http://digital-photography-school.com/11-tips-for-better-candid-photography
http://digital-photography-school.com/make-yourself-invisible-5-tips-for-successful-candid-photography

Your assignment is to shoot the equivalent of a full roll (24 pics) of pictures capturing people you don't know in a candid shot.
For each picture you should emphasize a specific composition element other than rule of thirds.
If you need a refresher on composition elements they can be reviewed at:

http://cybercollege.com/tvp023.htm
http://cybercollege.com/tvp024.htm
http://cybercollege.com/tvp025.htm

These include, but are not limited to: frame within a frame, leading lines, color contrast, movement and meaning, multiple levels of meaning, leading the subject, and using light to highlight or enhance a certain section of your picture. Move the camera around. Shoot high and low angles.

For this assignment I want you to get as far away from Shorecrest as possible. Seattle is a great place to shoot "random" people, but Lake Forest Park could be just as effective. Make sure you ask permission to take pictures (especially if you are taking pictures of kids).

Unintentional out-of-focus pictures will not be accepted. If you would like to try a some selective focus shots please tell me before you go out shooting and I can lend you a long lens.

Getty Images Candid Pics

Magazine 2 Adjustments


  • Use Photoshop to adjust your best 10 Magazine pictures.
  • Turn in your best10 pictures on a Contact Sheet called Magazine 2_adjusted.
  • Please make sure you pick 10 pictures of a variety of subjects shot from a variety of locations and angles.
  • You should have at least one landscape, macro or abstract, and action/activity picture.
  • Spend time on each picture making sure the exposure and color balance is correct.
  • These pictures should get people excited about visiting the city you chose.
  •   Next, turn your Best Six Pictures as Jpegs in a folder called: Magazine 2 Best 6. 
  • Finally, turn in your Best Picture for printing by itself called Best Magazine to Print.


Required Adjustments:

One Grayscale

Selective Focus

Vignette


Suggested adjustments:
One item left in color

Photo Filter

Brightness/Contrast

Cropping

Portrait/People shots: Gaussian Blur, Clone Stamp, and Patch Tool 


Due Today


Next up: Light Painting

Tuesday, February 26, 2013

Landscape Editing Assignment

  • Edit and adjust your ten best pictures. They should all have foreground, mid-ground, and background elements. 
  • The horizon line should be in the upper third or lower third. 
  •      Use Exposure, Photo Filter, Clone Stamp, Color Balance, Magic Wand/Quick Selection, Burn/DodgeCrop, and any other methods you need to make the pictures look awesome.
  •  Make sure they look “real.”
  •  Two of these picture need to be one item left in color
  •  Two of these pictures need to large Photo Filter Adjustment
  • One Selective Focus Picture
· Create contact sheet with ten best pictures called landscape adjusted _CS
· Turn in your best_adjusted_landscape full size as a jpeg

Friday, February 15, 2013

Video 1 Sequence

VIdeo 1 Sequence Assignment

Group 10-shot Sequence: A sequence is a series of shots connected together as part of a whole scene.

Example 1:

Example 2:

Example 3:
Example 4:
· 10 different shots
· Insert Shot
· Reaction Shot (cutaway)
Shoot a master shot of the whole sequence beginning to end
· Shoot every shot three different times from three different angles
· Raw Footage will be graded
· Edited video should include fade in/out, title, music, sound effects, and credits over black
No jump cuts
No continuity errors

Thursday, February 14, 2013

Photo 1: Landscapes over break


Your homework over break is to shoot landscape pictures.

You will shoot at least 72 pictures from at least three separate locations.
You may shoot horizontal and vertical landscape pictures.

You must shoot at least once during sunrise or sunset.


Please do not center the horizon line and try to show something in the foreground, mid-ground, and background.

Wednesday, February 13, 2013

B-Movie Posters

 
Steps for B-Movie Poster1. Brainstorm and sketch ideas on paper.
2. Spend time to get any background/landscape pictures that you need. Pick a place that you could potentially have monsters climb on/destroy/reappear from/or live. Your poster must have at least one digital image taken with a camera.
3. Import your background photos to your computer.
4. Create a new document in Photoshop at 8*10  inches with 200 resolution.
5. Add background photo to new document.
6. Manipulate photos to work within your poster. Use free transform to adjust sizes. Hold down the shift key to constrain proportions. Don't forget you need victims and a monster.
7.  Pick a text to create that is appropriate for your poster. Text with blood, fire, or multiple colors also seem to work best. You will make text for your movie name as well as tag-lines and movie stars. The text should go well together.
8. Once you have completed all of your poster you will need to merge layers and convert your picture to grayscale.
9. You will now paint your picture at approximately 23%-30% opacity. Pick colors that stand out.


Grading will be based on the following:
Creative movie title
Creative use of text effects for title and tag lines
Interesting/scary monster or villian
Use of digital image
Color Coordination
Realism of poster (does it look like something we would see in a theater)
Logo included
Movie details included in small print (directed by,starring, rating etc.)

Take your time on this project!

http://www.go-star.com/antiquing/movieposters.htm

http://www.moderntimes.com/palace/b/bposter.htm

Photo 2: Shoreline Magazine Editing and Winter Break Homework

Edit Your Shoreline Magazine Pictures

Today you will edit 10 of your landscape pictures in the following manner:
  • One Selective Focus
  • One One Item Kept in Color with the History Brush
  • One Vivid Color or High Saturation
  • Two Black and White/Grayscale
  • Two Vignette Style
  • Three of your choice

Please  create a Contact Sheet with all 10 pictures named Shoreline Adjusted and turn it in to the Classes/Period 1 folder on the server.
  Please make sure the picture adjustment name is saved under each picture in the contact sheet.

Please place your 6 best pictures in a folder. Yes, these are separate, full-size jpeg pictures. These pictures should be distinctly different in style, subject, and composition.

Turn in a Best Picture for Printing.

Homework:

  • Take (literally) a few hundred pictures in the city of your choice. 
  • Sell me this city via your pictures. Make me move there! Please try to get to six or seven locations within this city.
  • Shoot landscape, portrait, action, macro, candid, and abstract shots.
  • You must shoot at least once at Sunset or Sunrise
  • Shoreline and Lake Forest Park are not options for this assignment.
  • You will turn in at least three contact sheets when you return from break.

Monday, February 11, 2013

Photo 1 Landscape Work


Spend 45 minutes to read the following articles and watch the videos below. Take short notes on each suggestion. A few of the readings/videos repeat the same points. Also, make sure you look up the vocabulary words below so that you can understand the material. Please add these terms to your notes as well.

11 Landscape Hints
10 Landscape Tips


Terms to look up and learn: 
Shutter Speed
Aperture
Depth of Field
Focal Point
Slow Exposure

National Geographic Landscape Tips
Creative Composition Video
Photo 101 Video
Spend 45 minutes going outside to shoot 24-30 landscape shots from the baseball, football, and softball fields.
  • Make sure each shot has a large depth of field. In other words, make sure even the background objects are in focus.
  • In each shot make sure you have foreground, midground, and background objects.
  • (Most Landscape shots will have water, trees, and mountains. However, just do the best with what Shorecrest has to offer).
  • Do not center the horizon. Place it in the upper or lower third.
  • Look for lines on the ground or even in the sky.
  • Use tripods as needed.
  • Turn in a Landscape Practice CS at the end of the period


The image “http://akvis.com/img/examples/sketch/photo-on-sketch/landscape-photo.jpg” cannot be displayed, because it contains errors.http://i45.photobucket.com/albums/f93/pospisil/landscape.jpg


Sunday, February 10, 2013

Monday in Photo 1

Please import pictures and create a Contact Sheet called "Pick 4 CS 2."
 Turn the .pdf Contact Sheet into the STAFF server.

Next, grab your camera and go out and shoot two interesting pictures each for color balance and balance mass.
You will have 25 minutes to do this.
At the end of the period turn in your new Contact Sheet called "Pick 2."

Monday in Photo 2

Please import pictures and create a Shoreline Magazine Contact Sheet #2. Turn the .pdf into the STAFF server.
Next, start editing all of your best pictures.
  • Crop
  • Adjust Brightness/Contrast
  • Apply a Photo Filter
  • Eliminate garbage cans or power lines with Clone Stamp or Patch Tool
  • Adjust Shadows and Exposure
  • Use Color Balance to make your colors pop

A brief Photoshop Tutorial for those of you who need a refresher:
http://www.youtube.com/watch?v=6idvDikh-vM

Wednesday, February 06, 2013

Creating a Contact Sheet in Adobe Bridge

1. Import your pictures using Image Capture
2. Create a folder on your computer.
3. Drag the pictures you want to use in this Contact Sheet  into this new folder.
4. Open Adobe Bridge CS5
5. On left hand side find your folder and select it.
6. Select the files down below so that they show up in the Preview section. You can select the pictures via lasso, shift key, or command key.
7. On the right hand side select Output. Make sure .pdf is selected. Columns and rows will vary.
  • 6 pictures means columns and rows=2*3
  • 12 pictures means columns and rows=3*4
  • 24 pictures means columns and rows=4*6


 8. Click save in the lower right hand corner. Save to your pictures folder.
9. Upload .pdf Contact Sheet to the Staff Server>Mr. Mitchell>Correct Class Period

Photo 2: Shoreline Magazine Assigment

You work for Shoreline Magazine. Your job as the Photojournalist for Shoreline Magazine is to take pictures that will encourage people to visit or move to Shoreline. In other words, you need to take pictures of everything Shoreline (including Lake Forest Park) has to offer.
  • Take (literally) a few hundred pictures in Shoreline. 
  •  Please try to get to seven or eight locations.
  • Shoot landscape, portrait, action, macro, and abstract shots.
  • Shoot as far east as Lake Washington and as far west as Richmond Beach.
  • Don't forget about all the parks, trails, streams, (limited) nightlife, and even some of the stores.
Friday is an all-day shooting day. Go to your location at 7:45. Make sure you have a ride. Email me a picture when you arrive at your destination.
Return at 9:25.
Create a Contact Sheet in Adobe Bridge called 1_Naming Convention_Shoreline_CS_1

Homework:
Continue shooting. A new Contact Sheet is due Monday morning.

Friday, February 01, 2013

Digital Photo 1: First Week

Digital Photo: Composition Reading and Homework


This is not a writing intensive course, but there is some reading the first couple weeks of class.
Please take notes on the bold faced words as you read from the links below. You will be shooting the various composition elements this week and over the weekend. We will also have a quiz on this material as well.
Bring your own cameras on Friday.

Wednesday's Reading and Homework:

Homework:
http://www.microsoft.com/windowsxp/using/digitalphotography/learnmore/composition.mspx

In Class reading:
http://photoinf.com/General/Geoff_Lawrence/Composition.html

(Take quizzes at the end of each section below)

http://cybercollege.com/tvp023.htm Start reading at "Strive for Feeling of Unity"
http://cybercollege.com/tvp024.htm
http://cybercollege.com/tvp025.htm


  This Friday during class you will shoot 24-36 pictures with at least six different subjects. Please shoot three Rule of Thirds shots, three Unique Angle shots, three leading lines shots and three frame within a frame (using other objects to frame your subject) shots.


Homework: Do the same assignment except use subjects and objects away from school.

Due Monday the 11th of February: 12 INTERESTING shots using all four techniques described above. Some people will take 40-80 pictures for 12 good ones.

Digital Photo 2: Review Week


Digital Photo 2 Composition Review and Pick 6 Assignment

Please review the composition examples below:

http://photoinf.com/General/Geoff_Lawrence/Composition.html


http://cybercollege.com/tvp024.htm


http://cybercollege.com/comp_ex2.htm


Your assignment today is to shoot six compositions from the list below. If you have an SLR camera, please shoot these with the camera in MANUAL mode, adjusting both the F-stop and Shutter Speed each time (you can review shutter and aperture down below if necessary). 

I recommend shooting at least four or five attempts for each composition.


  • Rule of Thirds
  •  Color Contrast
  • Tonal Balance
  • Balance Mass
  • Leading Lines
  • Framing or Frame Within a Frame
  • Interesting Pattern
  • Selective Focus
  • S-Curve
  • Three objects creating a triangle  

Part 2 of the Digital Photo 2: Review Week

Digital Photo: Shutter and Aperture
http://www.photonhead.com/simcam/shutteraperture.php 
http://www.kamerasimulator.se/eng/?page_id=2
http://camerasim.com/camera-simulator/

http://photo.net/learn/basic-photo-tips/aperture-shutterspeed-iso/
 

Sunday, January 27, 2013

Animation Monday January 28

1. Export a 2nd or 3rd angle from Maya (see below).
2. Change your still frame duration in Final Cut Pro (see below).
3. Import your separate Maya angle folders into Final Cut Pro (see below).
3. Place your pictures from one angle into the timeline. Make sure the pictures are placed in the proper order.
4. Grab pictures you want from a new angle folder. Select 20-30 at a time. Place these picture directly ABOVE the exact same numbered pictures on the timeline (these will show on Video line 2).

Now when you play your animation you should see these new angled pictures instead of the old angle.
5. Add sound effects, music, titles, and credits.
6. File>Export>Quicktime Conversion>Apple TV format
7. Drop videos into the vidstore server

We will watch videos at the beginning of class Wednesday.
Please note, computers will be wiped Wednesday after school. Grab a blank DVD or use Dropbox to save your work before the computers are wiped.