Wednesday, December 19, 2012

Self Portrait Assignment


"Self Portrait Assignment
The Art of Constructing a Self-Portrait
A self-portrait comes from within. Injecting 'those we love' into the portrait steers one away from the harder task to trying to reveal self without adornment.
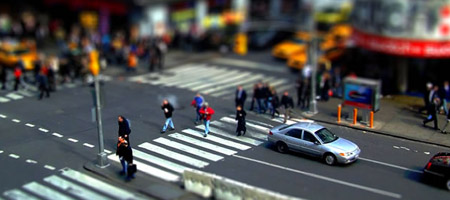
If you eat, sleep, and live for speed then your self-portrait should reflect motion and movement as one of its cornerstones.
If you are a reflective type, then reflections and patterns and their intersections should occupy a primary space.
If overall you feel more flawed then whole, then you wouldn't want to go about photographing the most pristine parts of yourself; you would want, instead, to capture your essence in a manner that describes and defines you without complaining. I say that because the essence of self-discovery requires you to be a benign observer of self so as not to hone in too closely on this or that part.
A sense of 'wholeness' is difficult to capture at best. Indeed, wholeness is almost impossible for some people to even understand -- let alone capture in themselves -- because their persons and their lives are so fragmented, so disorganized in general.
But that is what self-portraiture is all about, capturing the whole -- the whole of who you are as a person.
Try to be unforgiving in a benign and neutral way. Study yourself in the mirror and paint what you see there. Then go inside yourself and paint what you see there."
You will shoot four different self-portraits over break. You need to pick four photo types from the following five categories.
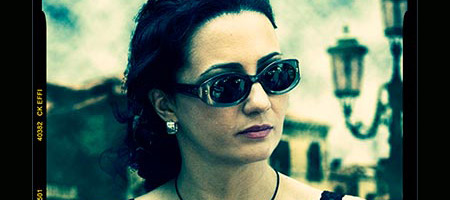
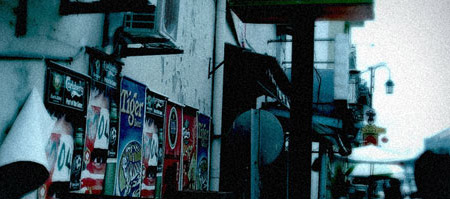
1. A self-portrait where color is emphasized. Color may include wardrobe, location, props, or natural objects. Think of your picture as a one or two color concept picture.
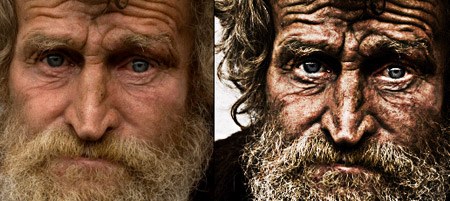
2. A picture that emphasizes lighting and shadows. This will be a grayscale self-portrait.
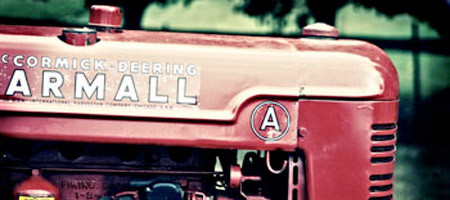
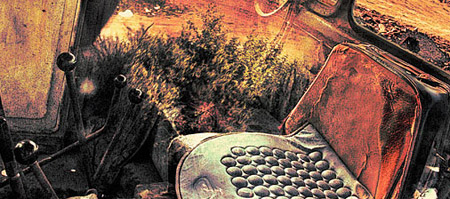
3. A self-portrait that showcases your interests and hobbies. In this picture we learn what you like to do away from school. Think about what interests you and transfer that into a photo.
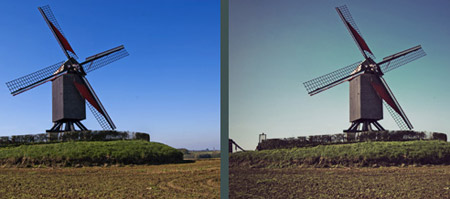
4. A fantasy self-portrait. Dress up and use costumes. In this self-portrait you can use Photoshop to enhance your picture in any way, shape, or form. Transfer yourself to Hawaii or become a Viking like you have always wanted.
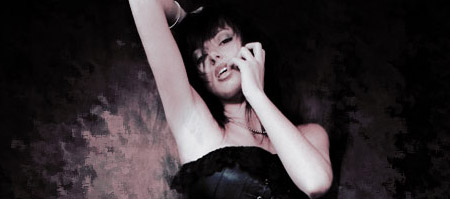
5. The Supermodel self-portrait. Dress up like a GQ or Cosmopolitan magazine model. This can be a grayscale or color picture. You will use Photoshop to airbrush and enhance this photo.


Hints for self-portraits:


Use colors or lighting to create a concept.

Costumes or uniforms work great.

Change angles.

Use props.

Vary the lighting.

Try different emotional looks.

Pose in action.

Most importantly for this assignment don't forget your composition rules. Use framing, leading lines, rule of thirds, color contrast etc. to enhance your photo. Fill the frame.

Tuesday, December 18, 2012

Text Tutorial for Sequence Assignment

Sequences

If you have overlap, use a layer mask

http://www.youtube.com/watch?v=ReDRMX2-8n4&NR=1&feature=fvwp

step by step

  • import pictures into Adobe Bridge
  • Export to Photoshop Layers: Tools>Photoshop>Load Files into Photoshop Layers
  • auto align layers in Photoshop
  • create a new black layer mask on your top layer (alt + click on the layer mask icon in the layer palette)
  • paint in white over your subject (sometimes lowering the opacity will help you see where to paint.
  • flatten image
  • add shadows as needed
  • save

Thursday, December 13, 2012

Photo 1: Sequence Assignment

Action Sequence Photography 25 Beautiful Examples of Action Sequence Photography
When you’re creating a sequence photo make sure you get all the action you need. This can be done by choosing the action setting on a DSLR. Make sure you have a camera that able to do high shutter speeds. A DSRL that can shoot 3-5fps can get you great results. Then set the camera up in a sturdy location or on a sturdy tripod so movement between frames is limited. Below are some truly amazing examples of sequence photography. The trick is to hold the camera steady and have the action move through multiple frames/photos:

Ray Demski


sports action 01  25 Beautiful Examples of Action Sequence Photography 

Examples

YouTube Sequence Tutorial 

Weekend Homework:
 Your goal is to shoot 7  sequences over the weekend with DRAMATIC action.  Pick sports or activities that are interesting a action packed.
 Make sure your shot is taken from a creative angle and demonstrates intense action. Each sequence should have 3-5 shots.
 

Tuesday, December 11, 2012

Editing Portraits

Editing Your Portraits: Photoshop "Vintage" actions

You will edit and turn in 18 of your Portrait photos. Please use at least 7 of the "vintage" style adjustments listed below.
Please make sure you save your work using the "vintage" name at the end along with the "Portrait Hint" that best matches your picture. For example, you might name your picture 4-Mitchellt-Lomo-Change-angle.
Make sure one picture has the hair colored.

 On Thursday the 13thth please turn in a Portraits Adjusted CS along with your Best Picture.

Article: Why We Love Instagrams from Macworld

Photoshop Actions:


"Nashville" Instagram Tutorial

Instagram Video Tutorial 

Cross Processing

Cross Processing
Cross processed photographs are recognisable from the unusual colours and tones in the final shot. The effect was originally produced from developing the photographic film using the wrong mix of chemicals. Nowadays, a cross processed style can be simply achieved in just a few steps. Photoshop Support shows us how.

Street Photography

Street Photography
One of the most recognisable street photography shots is ‘Homeless Mike’ by Leroy Skalstad. The gritty, high contrast style of the image really emphasises the nature of street life. Recreate a similar image with this Dramatic Gritty Effect by Photoshop Frenzy.

Lomo Photography

Lomo Photography
The Russian made Lomo LC-A camera was manufactured a cheap alternative to the higher quality Japanese rivals. It was poorly made and the photographs it produced were just as bad, however as time passed popular culture brought the mis-coloured shots from the Lomo camera into a whole new light, which is now a very sought after effect. Not everyone has the opportunity of trying out the original camera model, but Digital Photography School has some great tips on mimicking the effect in Photoshop.

Vintage Photo Effect

Vintage Photo Effect
With limited technology the early colour photographs often had poor colour reproduction, with shots having an obvious colour casts and inaccurate tones. Today the effect can transform a photograph, instantly sending it back in time to give the impression of an aged effect. Veerle takes us through some techniques for producing a vintage style photo using a few simple Photoshop tweaks.

Tilt Shift Photography

Tilt Shift Photography
Tilt Shift is a photographic technique where the image plane is rotated, giving a very shallow depth of field but maintaining sharpness in a specific area of the shot. One of the popular post processing effects related to tilt shift photography is known as miniature faking, where the depth of field manually added to a shot gives the illusion of tiny model figures and sceneries. TiltShiftPhotography.net has this fantastic overview of creating the effect yourself.


The Velvia Effect

The Velivia Effect
Fujifilm Velvia film created highly saturated, largely contrasting and extremely sharp images, which made it particularly popular with nature and landscape photographers. PSHero takes a look at using modern day Photoshop techniques to recreate the Velvia effect.

Dark Grunge Photo Effect

Grunge Photo Effect
The term grunge has evolved from the music genre also known as Seattle Sound, characterized by stripped down sounds and heavily distorted guitars. The term grunge also made its way into photo post processing, where the key features are muted colours and large areas of texture and grain. PSHero has this excellent tutorial for creating your own dark grunge photo effect.

HDR Photography

HDR Photographyhttp://still-scripts.com/photoshop/faking-the-hdr-effect-using-only-one-photo-and-photoshop/
High Dynamic Range Imaging is a photography technique that produces an image with a much larger range of luminance between the darkest and lightest areas, making it much closer to the spectrum seen by the human eye. More recently the effect has been pushed to the max, with heavy tone mapping producing an abstract and highly stylised photo effect. The genuine effect is created with various RAW images and processing software, but the Nill Photoalbum has this great tutorial for producing a similar style directly in Photoshop.

Movie Photo Effect

Movie Photo Effect
Alongside post processing, the video filming of movies often involves a range of camera filters. Ebin has this fantastic tutorial for creating a polished movie-like effect complete with diffusion glow and temperature tweaks in Photoshop.

Monday, November 26, 2012

Portrait Assignment

Digital Photography: Portrait Assignment


You will shoot portraits over the next two weeks on Thursday November 29  and Tuesday Dec. 4. 
One day you will shoot at school using the lights in the studio and the other day you will shoot off-campus at a predetermined location. 
You will shoot AT LEAST 24 pictures of your subject each day (most of you will shoot between 50 and 75 pictures.
You can, and probably should, take pictures on the weekend as well.

1. Find two interesting human subjects. The people you choose should WANT to be in the picture and they should be willing to cooperate. It's OK to work with people in this class.
2. Talk to your subject. What type of portraits do you want to create? Use colors or lighting to create a concept for your portrait. Costumes or uniforms work great. Imaginary ideas are OK. Choose an interesting setting based on your concept.
3. Change angles between shots. Shoot at least 24 pictures of each subject.
4. Use props if they will help the audience learn something about the subject.
5. Vary the lighting. Use filters, flashlights, lamps, or multiple lights to enhance your picture. Use the different lighting techniques that you will read about in class (see above).
6. Encourage different emotional looks. Pretend you are Austin Powers taking pictures. Tell your subject they are "groovy".
7. Having your subjects "pose" in action is just fine.
8. Most importantly for this assignment don't forget your compostion rules. Use framing, leading lines, rule of thirds, color contrast etc. to enhance your photo. Fill the frame.

Portrait HintsPart 1
Portrait Hints Part 2

More Hints

Even more hints


Here is a list of the different types of portraits photos you will turn in:

  • A Vignette Photo
  • A Grayscale Method Photo
  • A One Item Kept in Color Photo
  • A selective Focus Photo
  • A minimally adjusted photo
  • One WHACKY anything goes portrait (change the colors, use the liquefy tool, and make this as unique and interesting as you can)

Finally, you will turn in your best picture as well.
Lighting!!!
http://mrstorydigiphoto.blogspot.com/2011/12/different-lighting-techniques.html

Friday, November 16, 2012

Import Stop Motion Pictures into Final Cut

Animation: Import Pictures into Final Cut

1. Make sure the pictures are on the server for your whole group to get. Get the pictures.
2. Open Final Cut Pro
3. Go to Final Cut Pro>User Preferences
4. Select Editing>Change Still Frame Duration to 00:00:05
5. Go to File>Import>Import Folder> and select on your stop motion picture folder
Final Cut Shortcuts:
Render Red=Command R
Render Green=Control R
Selection (move tool)=A
Razor Blade (cut clips)=B

Wednesday, November 07, 2012

Stop Motion Assignment

Your next project is a stop motion animation assignment. You will work in groups of three. You will have two full class periods to shoot your assignment using my digital cameras. You will edit your videos on final Cut Pro and add sound effects and music.


http://www.youtube.com/watch?v=AJzU3NjDikY

http://www.youtube.com/watch?v=MtbQ4J3RfQ8&feature=related

http://www.youtube.com/watch?v=2_HXUhShhmY&feature=related

http://www.youtube.com/watch?v=DKWdSCt4jGE


http://www.youtube.com/watch?v=qBjLW5_dGAM

http://www.youtube.com/watch?v=BpWM0FNPZSs&feature=related

http://www.youtube.com/watch?v=o2pvO-FEqq4&feature=related

http://www.youtube.com/watch?v=5m23bL9AqB0&feature=related

http://www.youtube.com/watch?v=cYhhfHYZa5s&feature=related

Stop Motion Pre-Production

Please get in your groups and start planning your production.

1. Please use TEXT EDIT and turn in the following information in the STAFF server:

  • Group Member names
  • A four to five sentence description of your animation project. 
  • Please tell me what special "tricks" you will create to make your animation look interesting. What will your characters do that they can't do in real life?
  • Also, let me know if you are using props or if the characters are wearing costumes. Who will wear what outfits?
  • Most importantly please tell me the story from beginning to end.
  • What type of music will you use? Why?
  • What kind of sound effects will you add?
2. Create a storyboard of the first 45 frames.

 Each video will need:

1.                 Fade In/Out

2.                 Titles

3.                 Credits

4.                 Music and sound effects

Thursday, November 01, 2012

Photomerge Assignment


Your assignment over the next five to six days:

You will create three Photomerge pictures. These are 3-5 pictures that overlap to show a wide landscape or cityscape
Your three Landscape/Cityscape style Photomerges should be taken at two different locations at two different times of day.

Use a tripod if possible. Remember to manual adjust white balance or select something like "cloudy" or "sunny" on your camera.

Summary
  • Three locations
  • One Photomerge from each location
  • make sure each Photomerge is taken at a different time

Tentative schedule

Tuesday: shooting day, go to an AWESOME landscape location leave at the end of Ti2
Thursday: shooting day, go to an AWESOME landscape location, leave at TAP
Weekend: At least one more location

Note: I would shoot at least eight or nine Photomerges from each location. Shoot each attempt at a slightly different angle. Again, and I can't emphasize this enough, a tripod really helps.


Tuesday, October 30, 2012

How to Edit and Turn in Your Action Pictures

     Turn in 24 picture Action Contact Sheet
 
·      Start Editing Your Ten Best Action Pictures
Make sure you have 1 grayscale, one one-item kept in color, and two mild selective focus picture
·      Do Not Add Text (yet)
·      Create a Folder with your ten best Action Pictures as JPEGS
·      Name the folder with your name and the name of the sport
·      Drop the folder into the Vidstore Server>Public>Yearbook Action Photos
  1. Go
  2. Connect to server
  3. Vidstore.shorelineschools.org        
  4. Name: scvideo
  5. Password: Outback23
  6. SCvideo classes
  7. Public Folder
  8. Yearbook Action Photos

·      Add Text to Pictures
·      Use student names and teams when describing action
·      Turn in Action Photos adjusted to Staff Server as a Contact Sheet
·      Turn in Best Action Picture without text
 

Thursday, October 25, 2012

Action Photo Practice

Action Photo Practice

Today you will shoot and turn in a full contact sheet of action pictures. 
You should have 10-12 SUCCESSFUL panning style pictures using shutter speeds of around 1/20-1/60 and then 10-12 pictures of regular fast shutter speeds (usually 1/250-1/2000).
Have your subjects repeat the same action over and over.

How many of you remembered to bring some sporting equipment?

Suggested activities to shoot: someone running across the field, someone doing back handsprings or other gymnastic moves, anyone playing catch with a football or baseball, and hackysack etc. 
 

Crocodile Hunter.
 
Please return to class at 11:35 so you can upload your pictures and turn in the Contact Sheets. 
Your SC Sports pictures are due Tuesday.
We have a quiz Monday.

Monday, October 22, 2012

Creating Action Script

To create a STOP action script do the following:
1. Create a STOP layer on your animation timeline.
2. Control click and select actions.
3. Under TIMELINE CONTROL in the upper left hand corner double click STOP.


To create ACTION SCRIPT for your button do the following:
1. Click the frame that your button appears in the timeline.
2. Select directly on your button you have created down in the work area (not on the timeline).
3. Control Click>Actions
4. Under MOVIE CLIP CONTROL select ON and then RELEASE
5. Move the cursor to the second line
6. Under TIMELINE CONTROL select GOTO AND PLAY and then type in the frame where you want the button to transport the gamer player on the timeline.
Note: at the bottom of the Action Script commands your button should be selected under current selection:


Monday, October 15, 2012

Animation: Choose Your Own Adventure Assignment

CHOOSE YOUR OWN ADVENTURE ASSIGNMENT:
For this project you will be creating an adventure of some sorts that pauses periodically and gives the viewer a choice in where the story goes, thus a "choose your own adventure" tale! Your movie must contain:


* Full figures with detailed animation (no stick figures)
*multiple motion and shape tweens
* movie clips
* at least six instances of sound, sound should FILL your animation

* 8 Buttons
* goto and play
* stop
* up, over, down, hit states
At least three places where decisions need to be made


Please answer the questions below using Text Edit and drop the responses into the Staff Server>Mitchell>Classes>Period 1
Use complete sentences.

* Who are the characters? List at least two.
*Where does the story take place?List precise location with details.
* What is the main story from beginning to end? What is the main character trying to do?
* What are the options in the choose your own adventure? What are the outcomes?
* How will your animation be more interesting and better looking than your last project?

Monday, October 08, 2012

Flash Tutorials for Choose Your Own Adventure Assignment

Button:
http://www.youtube.com/watch?v=NLP7A9IYptU

Action Script 2.0
http://www.youtube.com/watch?v=PdvPEaoU7tg&feature=related

Action Script 2.0

http://www.youtube.com/watch?v=Q-QkWaY9y1o&feature=related

Grayscale Adjustments

Grayscale Adjustment Assignment

Please adjust your best 24pictures (out of the 48) pictures using the six methods we discussed in class.
You must adjust four pictures for each adjustment method.

The adjustment methods: Basic Black and White (BBW), Calculations Method (CM), Lightness Channel (LC), Ansel Adams(AA), Duotone (DUO), and Basic Channel Mixer (BCM).

Please save and name each picture with the appropriate adjustment method abbreviation (BBW or CM etc.)


Thursday is your final Shooting Day for this project. You will pick a location where you can focus on MAN MADE shadows. Please bring your own camera.


Tuesday, October 02, 2012

Digital Photo 1: Grayscale: Pattern and Shadow Assignment


Your assignment over the next two weeks is to shoot 24 pictures involving man-made shadows and 24 other images involving lightness/darkness relationships with a focus on patterns. 48 pictures total.

  • Thursday October 4 is an off-campus shooting day.
  • Your homework over the weekend is to shoot 24 pictures with your own camera. For your weekend assignment you may shoot outside during the day or at night. Or, if you prefer, you may use man made light at any time.
  • Tuesday you will edit pictures in class using the various methods we have discussed in class.


AP Photo: Shapes and Textures etc.

Read and take notes. There will be a note check today.

Shooting vertical or horizontal
http://www.kodak.com/ek/US/en/Home_Main/Tips_Projects_Exchange/Learn/Photo_Tips_Techniques/Advanced_Techniques/Composing.htm

Choosing a main point of interest

http://wwwca.kodak.com/CA/en/consumer/guideToBetterPictures/eStores/index.jhtml?style=&cat=9&subCat=1

Adjusting your angle of view

http://wwwca.kodak.com/CA/en/consumer/guideToBetterPictures/eStores/index.jhtml?style=&cat=9&subCat=2

Placing the subject off-center

http://wwwca.kodak.com/CA/en/consumer/guideToBetterPictures/eStores/index.jhtml?style=&cat=2&subCat=5

Using leading lines

http://asp.photo.free.fr/Composition/photoProgramCompClass41.shtml
Click NEXT for examples.

Avoiding distracting backgrounds 

http://asp.photo.free.fr/Composition/photoProgramCompClass62.shtml
Click NEXT for examples. 

Including foreground objects

http://wwwca.kodak.com/CA/en/consumer/guideToBetterPictures/eStores/index.jhtml?style=&cat=2&subCat=6


Project

After reviewing the rule of thirds and visiting the above assigned Kodak sites, you are to photograph the following Plan Your Photo Composition (36 works):


1. Hands (such as braiding hair, holding something, working on something) (4 works)

2. Feet/Shoes (4 works)
3. Geometric Shadows/Forms (4 works)
4. Organic Forms and/or Texture (4 works)
5. White on white/eggs (4 works)
6. Lines (4 works)
7. Glass/transparency (4 works)
8. The remaining photos are your choice (8 works)

You will most likely shoot 350-400 pictures to get 36 total picture. In general plan on shooting at least 10 shots per turned in picture.

October 4: Read and take notes. Then explore the web looking for examples of each composition and subject listed above. You can take practice pictures as well.
Thursday October 4: Out of class shooting day (you can shoot in the studio if necessary)
Tuesday October 9: Import and Editing
Thursday October11: Out of class shooting ((you can shoot in the studio if necessary)
Friday October 12: Import and editing

Wednesday, September 26, 2012

Next Animation Assignment: SCNN Commercial

Your next assignment will be a 15-25 second SCNN commercial for anything school related. This could include a dance, a game, a club, an event, or anything else. Content must be related to the specific school related item.
All animation should look sharp and detailed.
Use school colors where appropriate.


Your animation needs to include:
  • Music AND sound effects throughout
  • Keyframe animation
  • Shape tween
  • Two Motion Tween
  • Two Movie Clips
  • Text that says either "SCNN" or the information for the school club, group, or event
  • Voices created by you using Garageband or other programs
Most of these projects will be between 200 and 400 frames each at 12 frames per second.

The Shorecrest Web Site: http://schools.shorelineschools.org/shorecrest/
Fall Sports Teams: http://schools.shorelineschools.org/shorecrest/asb/athletics.php#teams

Here is a list of clubs:
http://learn.shorelineschools.org/shorecrest/sasb/index.php#activities_clubs_organizations

Monday, September 24, 2012

Wednesday, September 19, 2012

First "Real" Animation Assignment

Animation Assignment

  • 5+ layers
      60+ frames
      15+ keyframes
      foreground, mid-ground, and background
      both shape and motion tweens
  •  2 Movie Clips
  • All items on separate layers
  • 12 FPS
You will work on this assignment Friday, Monday, and a portion of Wednesday.

Tuesday, September 18, 2012

Photography: Tuesday Class Work

You will take pictures emphasizing camera composition we discussed in class. Please fill the frame in every shot with something interesting. Boring pictures will not be accepted.

  • 10 landscape shots showing proper use of the horizon line (I would shoot from the baseball, football, and softball fields). Please try to show foreground, mid-ground, and background if possible
  • 3 Shots Tonal Balance
    3 Shots Balance Mass
    3 Shots Patterns  
When you are finished please import your pictures into Image Capture or iPhoto using your USB cable. Create a contact sheet named Comp3. Always use the naming convention.
Turn your Contact Sheet into the Staff Server>Classes>Period 4.

Thursday is your first off-campus shooting day for landscape pictures. You can only leave campus if you  have Composition 1,2, and 3 turned along with your off-Campus permission form.
  • Please pick an interesting location like Gasworks Park, Kerry Park, Richmond Beach, or the Edmonds Ferry Terminal.
  •  Arrange rides today. Talk to your friends, parents, or arrange your bus schedule.
  • Sign out at the beginning of TAP.

Monday, September 10, 2012

Digital Photo: Composition Reading and Homework


This is not a writing intensive course, but there is some reading the first couple weeks of class.
Please take notes on the bold faced words as you read from the links below. You will be shooting the various composition elements this weekend and next week. We will also have a quiz on this material as well.
Bring your cameras on Friday.

Wednesday's Reading and Homework:

Homework:
http://www.microsoft.com/windowsxp/using/digitalphotography/learnmore/composition.mspx

In Class reading:
http://photoinf.com/General/Geoff_Lawrence/Composition.html

(Take quizzes at the end of each section below)

http://cybercollege.com/tvp023.htm Start reading at "Strive for Feeling of Unity"
http://cybercollege.com/tvp024.htm
http://cybercollege.com/tvp025.htm


  This Thursday during class you will shoot 24-36 pictures with at least six different subjects. Please shoot three Rule of Thirds shots, three Unique Angle shots, three leading lines shots and three frame within a frame (using other objects to frame your subject) shots.


Homework: Do the same assignment except use subjects and objects away from school.

Due Monday the 17th of September: 12 INTERESTING shots using all four techniques described above. Some people will take 40-80 pictures for 12 good ones.

First Animation Assignment 2012

I would like you to visit the following websites and watch a variety of flash animation.

When you are done watching the animation (spend about 30-35 minutes or so on this) I would like you to tell me what your three favorite flash movies were and why you liked them.
Did you like the storyline? Animation style? Sound effects? Music?
Please list this information, along with the link to access the animation, in the comments section below. Don't forget to put your name at the beginning so I know you did your work. Please use headphones.


http://www.google.com/#hl=en&sugexp=gsis,i18n%3Dtrue&cp=8&gs_id=r&xhr=t&q=flash+animation&qe=Zmxhc2ggYW4&qesig=4HzSe-7WX88H955yLaEwJw&pkc=AFgZ2tmWnBPedwme1MAPR0IZWb6hGzKL87L_oLRBub29FOmOGiZsvxlRoixp1KAnPnmFgVptKUxydmG2-3nd3yE7QtnyFR_ObA&gs_sm=&gs_upl=&um=1&ie=UTF-8&tbo=u&tbm=vid&source=og&sa=N&tab=wv&bav=on.2,or.r_gc.r_pw.r_cp.&fp=47b7749a5a622465&biw=1779&bih=941&surl=1&safe=active


http://youtube.com/results?search_query=flash+animation+movies&search_type=&search=Search


Welcome to class! Don't forget to fill in the comment section with your favorite videos. Log in as anonymous and then write your name and class period at the top of your comment.
Mr. Mitchell

Thursday, June 14, 2012

Multimedia: Super Hero Comic Book Cover

Your last assignment in this class is to create a super hero comic book cover.
First, you will make the text.
Next, you will make at least one character using shapes, the pen tool, and any other tools of your choice.
You can add other characters and action as needed, but you must have the text and at least one character.

Thursday, May 31, 2012

Illustrator 1 Tutorial

http://www.youtube.com/watch?v=8VEQHcJTolo

Adobe Illustrator Tutorials

http://blog.spoongraphics.co.uk/articles/20-basic-illustrator-tutorials-every-beginner-should-see

Self Portrait Editing

1 vignette
1 soft focus background
1 selective focus background
1 black and white
1 Instagram
1 heavily cropped
1 one-item left in color
1 over saturated  color
1 with extreme color change to hair or clothes etc.
1 of your choice

Use patch tool and clone stamp to touch up blemishes and redness etc.
Whiten teeth.
Fix over or under exposed pictures.

Tuesday, May 22, 2012

SCNN Commercial

 4th Period

Students need to FINISH their SCNN commercial this period. SCNN airs tomorrow.
·     Please record your voice using the headsets at the font of class.
·     Open Garageband before you plug in the headset
·     Export your voice component from Garageband using “Share to Disk” and saving it as an MP3.
·     Add your audio in Flash using File>Import to Library
·     Make sure all of your sounds are on different layers.
Turn your projects into the vidstore server Period 4.

Sunday, May 13, 2012

Photo 2: Fashion Work

Fashion Cover Work

Start your Fashion Magazine Cover and Adjustments. The assignment is listed below:

You will create a magazine cover page using your best Fashion picture. You will also create a eight-picture photo spread that details what your subject is wearing. Before I give you some tutorial examples, here and here are some example covers. Click on the images to get ideas for your cover.

Before you start your cover, you need to edit and adjust your pictures to make them look professional. Here is a list of adjustment methods we did last semester:

Clone Stamp (CS)
Patch Tool (P)
Gaussian Blur (GB)
Color Hair (CH)
Whiten Teeth (W)
Removing Hot Spots (HS)
Healing Method (HM)
Glamour Skin Softening (GS)

If you do not remember how to do these adjustments feel free to use the Photoshop book at the front of the room. Take your time. You have a few days to adjust your pictures and make your cover and picture spread. The bottom line is this: get rid of blemishes, tone down hot spots or glare, soften the skin, adjust colors for emphasis, use black and white (greyscale) if necessary, crop for effect, and play around with brightness/contrast etc.

Magazine Cover Tutorials: You can use the tutorials or create a cover without a tutorial.

http://www.myphotoshoptutorial.com/2009/01/easy-magazine-cover-in-photoshop
/

http://www.tutorialstraining.com/cstutorials/advertisingdesign/magazine/twistrcodedtutorial.htm

http://huzeyk.blogspot.com/2006/02/magazine-cover-masthead-editing.html

http://www.tutorialized.com/view/tutorial/On-the-Cover-of-Rolling-Stone-Magazine-Cover-in-Photoshop/32171

After you create your cover you need to add text to eight of your pictures. This text, done in the same style as the Action Pics and Spring Quote Pics, should tell us the brand of each item of clothing like this example:

A quote from the subject or something interesting about the items is also a nice touch.

Thursday, May 10, 2012

Multimedia: SCNN Commercials

Pick an event or school activity that takes place between May 18 and June 8th.
Create a 15-20 second commercial for this even that includes the following:
  • Two Movie Clips
  • One Shape Tween
  • Two Motion Tween
  • Detailed Backgrounds
  • Seven Layers
  • Music in the entire clip
  • sound effects as needed
  • voice over (your voice or someone else's voice)

Wednesday, May 09, 2012

Stop Motion 2: what is needed?

Your second Stop Motion assignment is essentially the same as the last one, except that instead of animating people you are animating objects of your choice.

What you need:

800 Pictures (all in focus)

Fade In/Out

Titles

Credits

 Music

Eight instances of sound effects


Tuesday, May 08, 2012

Digital Photo2: Fashion Shoot Assignment

Fashion Magazine Assignment

You are working for a fashion magazine that sells clothing to a specific audience. Your job together is to shoot two picture spreads to sell two different styles of clothing and accessories. This includes pants, coats, shirts, scarfs, shoes, socks, belts, dresses, shorts, and anything else a person can wear.

Your pictures should show a variety of composition and also showcase a variety of ways to light your subject. Please review lighting techniques here.
Please review portrait tips here.

Please look through, watch, and read about the following fashion shoots.

Examples:
Beyond The Sea
Grey Gardens
In the Trenches
Megan Fox

True Blood
Jessica Biel
Katy Perry

Lighting
Fashion Setup 


Requirements:
You must choose a partner from class.
You will model for each other on Thursday and Tuesday.
You will shoot one day outdoors and one day in the studio.
Your location away from school needs to be unique and interesting on it's own.
Get creative. Play dress up. Dress stylishly and/or uniquely.


Please get together with your partner  and answer the following questions using Text Edit. This is due on Tuesday/Wednesday.

1. What are your names?
2. What two magazines are you shooting pictures for? Why? What types of clothing are you trying to sell?
3. What day are you using the studio?
4. What specific clothing will you wear each day? What accessories will you bring to enhance your shoot?
5. Where do you want to shoot outside of school? Why?
6. How will you ensure that you give 100% on this project? What can you do to make these pictures the best pictures you've taken in class?
7. How will you use lighting to make your pictures interesting? Be specific.

Bring your cameras Thursday. If you are shooting away from school you can go directly to your shooting location.

Monday, April 30, 2012

How to Adjust Your Arch_City_Still Pictures

You will adjust 24 good pictures, eight from each category.
12 of these pictures will be black and white (grayscale).
6 must be full color.
6 Adjustments of your choice.

Work through all of the tutorials listed below and remember to save the picture using the name of the conversion:

Seven Grayscale Conversions
Grayscale Color Mode
Channel Mixer 1
Channel Mixer 2
Metallic
Adjustment Layer
Split Toning
Adding Grain

Tuesday, April 17, 2012

Spring Quote Edits

10 Adjusted pictures with text. Please include:
One item Left in Color
Best Depth of Field
Best Selective Focus
One Hypercolor or Oversaturated Picture
One darker picture or limited light picture
One High Contrast
Four of your choice (may include Instagram Actions)


Turn in 10 Spring Quote Adjusted
Best Spring Quote Picture: This picture should look amazing.

Digital Photo 2: Still Life, Architecture, and City Scape

Still Life Photography
Your next assignment is very large in scope and includes a variety of picture styles.
I am including still life, architecture, and city scapes as one assignment because many of you will be in a variety of places for spring break. You will shoot contact sheets for all three categories. However, in what order you choose to do shoot them is up to you.

Still Life Examples


Cityscape Examples


Schedule
Shooting Day 1: April 19
Shooting Days 2 and 3: Spring Break
Importing and editing April 30 and May 1
Shooting Day 4: May 3 and Pictures Due
May 4: Editing

Sunday, April 15, 2012

Monday April 16th

2nd Period:
Please edit your best 10 Spring Quote pictures. You don't need to worry about adding text yet.

4th Period:
Please spend the entire period planning, designing, and brainstorming your Teen Magazine assignment.
Here is what is the due at the end of the period:
 Get a blank sheet of paper and design a rough draft of your magazine.
Please include: title of magazine, layout of pictures, headlines, and anything else that will make your magazine stand out.
Don't forget, Tuesday is a shooting day. You and your partners need to dress appropriately.

5th Period:
1. Make sure you have all of your stop motion pictures on your computer. Put all of these pictures into one folder on the desktop.
2. Open Final Cut Pro and create a new project
3. Select Final Cut Pro in the upper left hand corner and then select User Preferences. Change the Still Frame Duration in the upper left hand corner to 00:00:00:05. (Click here to see a detailed tutorial).

4. Go to File>Import and Select folder. Pick your Stop Motion pictures folder. The folder will show up in the Browser in the upper left hand corner.
5. Drag pictures into timeline as shown here. Lengthen, shorten, or delete clips as needed.
6. Import music and sound effects to Final Cut: File>Import>File Pick music and sounds that work for your video. We need sound throughout the entire animation.
7. If you have not used Final Cut before you need to watch this video in order to understand the layout.