Wednesday, January 13, 2016

Photomerge Assignment

Photomerge Assignment


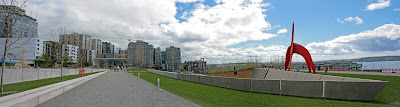
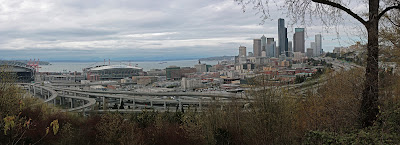
Your assignment over the next week is to take multiple  panorama style photomerges.  Take a picture and then move the camera slightly up or sideways to take another "connected" image. Basically you combine smaller pictures to make one larger picture.

Use a tripod if possible. Remember to manual adjust white balance or select something like "cloudy" or "sunny" on your camera.

Here is how you connect multiple pictures in Photoshop.

To set up a new Photomerge composition:
Import Photos
Place pictures in a separate folder for each merge
Do one of the following:
Choose File > Automate > Photomerge.
In the File Browser, select the images you want to use and then choose Automate > Photomerge from the File Browser menu bar
In the dialog box, choose an option from the Use pop-up menu:
  • Files to generate the Photomerge composition using individual files.
  • Folders to use all the images stored in a folder to create the Photomerge composition. The files in the folder appear in the dialog box.
  • Open Files to use the image files you have open in Photoshop.
Click the Browse button to navigate to the source files or folder you want to use to create the Photomerge composition. Select Attempt to Automatically Arrange Source Images if you want Photoshop to try to line the images up in their proper order.
Then edit your picture as you need.

Here is a tutorial you can use to get you going.
http://www.youtube.com/watch?v=qrNI-gAuI5s 

Tentative schedule

Wednesday January 13: Practice at school up by the track,the front of the school or Hamlin. Take seven different photomerges comprised of 3-9 pictures each. Turn in Photomerge Practice Contact Sheet.
Merge your pictures in Photoshop using the directions above.
Friday January 15: All period off-campus shooting day. Pick an amazing location and shoot seven photo merges consisting of 3-9 pictures each. Turn in Photomerge CS1. These pictures will not be merged together.
Weekend Homework: Go to one landscape location and shoot seven different photo merges consisting of 3-9 pictures each. Turn in Photomerge CS2. These pictures will not be merged together.
Wednesday January 20: All period off-campus shooting day. Pick an amazing location and shoot seven photo merges consisting of 3-9 pictures each. Turn in Photomerge CS3. These pictures will not be merged together.
Friday January 22: Photomerge editing.
  

Monday, January 11, 2016

Turning In Portraits

Portraits
·  Make sure Portrait CS is turned in to server.
·  Take a few minutes to pick your two best pictures, one from each session.
·  Turn in two best pictures. Call Picture 1 Portrait For Grade and Portrait 2 Portrait For Print. I will actually print both.
·  Open both pictures on desktop
·  Take out paper and pencil/pen.

Friday, January 08, 2016

Portrait Editing and Turn In Details


  • Re-touch and turn in 20 portraits in a 4*5 Contact Sheet.  Call it Portrait CS. Use as many adjustment methods as needed for each picture.
  • Turn in 8-12 pictures from each location (at SC and away).
  • Turn in at least 12 different types of Portrait Hints (review notes). Make sure each photo has the Portrait Hint name.
  • One picture can have different hair color or other fun (but realistic) changes.
  • Eliminate green screen background because it does not look professional. Replace it with black, white, a different color, or a background from a different picture. It still needs to look real.


Monday, December 14, 2015

Designing Your Game

-->
Designing and Creating a Video Game
 (pre-Unity)
1.        Decide on a concept
2.        Genre
3.        Outline: 2D or 3D, Setting, Players, Characters, Enemies, obstacle, difficulties, and core mechanics (what is absolutely necessary)
4.        Sketches
5.        Story
6.        Research
7.        Know your limits: 5 weeks to create game
8.        Game Title


Wednesday, December 09, 2015

Digital Photography Portrait Treatment

Please email me the answers to the questions below. Please use complete and detailed sentences. Tell me everything. My email is trent.mitchell@shorelineschools.org

Portrait Treatment

Wednesday:
Who are you working with on Wednesday? 
What is your concept? Please be specific.
What will your subject wear?
What accessories or props will your subject need?
What will you wear?
What will you need to bring?
Are you shooting at school or off campus?


Friday:
What is your concept? Please be specific.
What will your subject wear?
What accessories or props will your subject need?
What will you wear?
What will you need to bring?
Are you shooting at school or off campus?

Digital Photography Portrait Assignment

Digital Photography Portrait Assignment

You will shoot portraits next week on Wednesday December 16th and Friday December 18th. 
One day you will shoot at school using the lights in the studio and the other day you will shoot off-campus at a predetermined location. 
You will shoot AT LEAST 24 pictures of your subject each day (most of you will shoot between 50 and 75 pictures.
You can, and probably should, take pictures on the weekend as well.

1. Find two interesting human subjects. The people you choose should WANT to be in the picture and they should be willing to cooperate. I highly suggest working with people in this class.
2. Talk to your subject. What type of portraits do you want to create? Use colors or lighting to create a concept for your portrait. Costumes or uniforms work great. Imaginary ideas are OK. Choose an interesting setting based on your concept.
3. Change angles between shots. Shoot at least 24 pictures of each subject.
4. Use props if they will help the audience learn something about the subject. 
5. Vary the lighting. Use filters, flashlights, lamps, or multiple lights to enhance your picture. Use the different lighting techniques that you will read about in class (see above).
6. Encourage different emotional looks. Pretend you are Austin Powers taking pictures. Tell your subject they are "groovy".
7. Having your subjects "pose" in action is just fine.
8. Most importantly for this assignment don't forget your compostion rules. Use framing, leading lines, rule of thirds, color contrast etc. to enhance your photo. Fill the frame.

Please take detailed notes on the readings below. You will (literally) reference these notes when you take pictures next week.
Wednesday Reading # 1:Portrait HintsPart 1
Wednesday Reading #2Portrait Hints Part 2

More Hints

Even more hints


Here is an early list of the different types of portraits photos you will turn in. More will be added.

  • A Vignette Photo
  • A Grayscale Method Photo
  • A One Item Kept in Color Photo
  • A selective Focus Photo
  • A minimally adjusted photo
  • One WHACKY anything goes portrait (change the colors, use the liquefy tool, and make this as unique and interesting as you can)

Finally, you will turn in your best picture as well.
Lighting!!!
http://mrstorydigiphoto.blogspot.com/2011/12/different-lighting-techniques.html 

Friday, December 04, 2015

John's Boss Script

using UnityEngine;
using System.Collections;

public class BossController : MonoBehaviour {

    public float bossHealth;
    public GameObject explosion;
    public int scoreValue;

    private GameController gameController;

    void OnTriggerEnter (Collider other)
    {
        if (other.CompareTag ("Boundary") || other.CompareTag ("Enemy"))
        {
            return;
        }
        bossHealth = bossHealth - 1;
            if (bossHealth == 0)
        { 
            Instantiate (explosiontransform.positiontransform.rotation);
            Destroy (gameObject);
            gameController.AddScore (scoreValue);

    }
}
}

Editing Abstract and Macro


·   You will turn in 16 Edited jpeg Photos on a 4*4 Contact Sheet called Abstract Macro Adjusted
·   Try to have the same amount of Abstract and Macro pictures
·   8 adjusted exactly as described in the tutorials
·   8 adjusted free choice

Sunday, November 22, 2015

Monday Nov. 23rd Digital Photo 1: Abstract and Macro Photo Assignment


  • Please sign out at the beginning of the class period.
  • Please take abstract and macro pictures all period long away from Shorecrest. Pick someplace fun or interesting.
  • Import photos when you return.
  • Please turn in a 24 picture 4*6 "Abstract and Macro CS2" at the end of the period.

Friday, November 20, 2015

Updated Destroy By Contact Script

using UnityEngine;
using System.Collections;

public class DestroyByContact : MonoBehaviour 
{
    public GameObject explosion;
    public GameObject playerExplosion;
    public int scoreValue;
    private GameController gameController;

    void Start ()
    {
        GameObject gameControllerObject = GameObject.FindGameObjectWithTag ("GameController");
        if (gameControllerObject != null)
        {
            gameController = gameControllerObject.GetComponent <GameController>();
        }
        if (gameController == null)
        {
            Debug.Log ("Cannot find 'GameController' script");
        }
    }

    void OnTriggerEnter(Collider other)
    {
        if (other.tag == "Boundary")
        
        {
            return;
        }
        Instantiate (explosiontransform.positiontransform.rotation);
        if (other.tag == "Player") {
            Instantiate (playerExplosionother.transform.positionother.transform.rotation);
            gameController.GameOver ();
        }

        gameController.AddScore (scoreValue);
        Destroy (other.gameObject);
        Destroy (gameObject);
    }
}