Tuesday, November 03, 2009

Photomerge Assignment


Your assignment over the next five to six days:

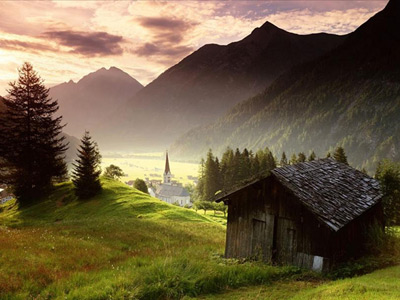
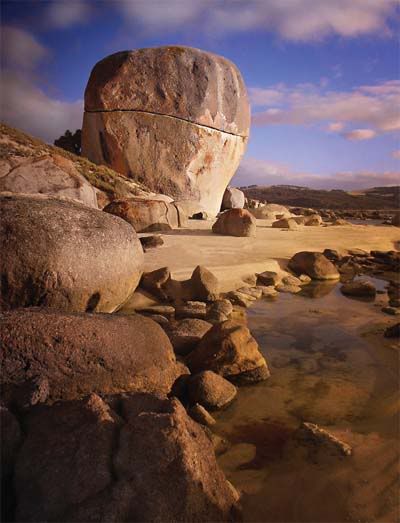
You will create Photomerge pictures. These are 3-5 pictures that overlap to show a wide landscape or cityscape (one big picture).

Your three Photomerges should be taken at three different locations at three different times of day: sunrise, afternoon, and sunset.

Use a tripod if possible. Remember to manual adjust white balance or select something like "cloudy" or "sunny" on your camera.

Summary
  • Three locations
  • One Photomerge from each location
  • make sure each Photomerge is taken at a different time

Schedule:
Thurs/Fri: Out of Class Shooting
Fri-Mon: Photomerge Weekend Homework

All three locations are due next Mon


Monday, October 26, 2009

Beauty Is...sketches

Your sketches filled with four fantastic "Beauty Is" concepts are due before you go shooting on Tuesday and Wednesday.

Thursday, October 22, 2009

Beauty is...

Homework:
24 Pictures reflecting the "Beauty Is" theme. This can be 24 different pictures or 12 different angles from one really good idea.

Tuesday, October 20, 2009

Abstract Adjusted Assignment

Please adjust five pictures for each adjustment method:
Vignette (Vig)
Keep one item in color (col)
Change An object's color (chg)
Vivid Color (Viv)
Grayscale (Name of Grayscale Method)
Selective Focus/Depth of Field Effect (Sel)

  • 18 Pictures total on the abstract_adjusted_CS.
  • Roughly three pictures per adjustment method.
  • Please remember to save each picture with the correct adjustment.
Turn in your best picture as a jpeg file. Name it Best Abstract.

Thursday, October 15, 2009

Wednesday, October 07, 2009

Abstract Photo Assignment

For this assignment you will shoot all day Monday in class and this weekend. You need to shoot a minimum of 24 different objects in an abstract way.

Please look at the links below for examples of abstract work.
Googled

Earth Photography

Photo.net

123rf.com


For this next assignment I want you to throw out all of the "rules" we've discussed in class this semester. This is your chance to be as creative as possible. I would recommend looking for patterns, colors, and shapes when deciding on pictures to take. Also try to think of things you don't normally see pictures of.

Monday, October 05, 2009

Patterns/Shadows Adjustment

Please adjust your pictures using the six methods we discussed in class.
You must adjust five pictures for each adjustment method.

The adjustment methods: Basic Black and White (BBW), Calculations Method (CM), Lightness Channel (LC), Ansel Adams(AA), Duotone (DUO), and Basic Channel Mixer (BCM).

105 and 10/6 Homework

Please get at least ten more shadow pictures using the Sun.
If you can, try to incorporate patterns in these pictures.

Tuesday, September 29, 2009

Grayscale: Pattern and Shadow Assignment


Your assignment over the next few days is to shoot 24 pictures involving man-made shadows and 24 other images involving lightness/darkness relationships with a focus on patterns.
24 pictures are due at the end of the period Thursday/Friday and the other 24 pictures are due on Monday.


Monday, September 28, 2009

Monday in Photo

  • Get in groups of 3-4
  • Each student will shoot 10 pictures of one human subject.
  • You must use manual settings to adjust aperture (f-stop) and shutter speed for every picture.
  • One of your ten pictures should show excellent color, lighting, and focus etc. The others will show manual experimentation.
  • You must incorporate a composition element besides rule of thirds (color contrast, balance mass, leading lines, framing, and patterns etc.)

Please return to class at 2:05. Import your 10 pictures and turn in a contact sheet called “naming convention_manual 2.”

Tuesday, September 22, 2009

Due Today and Wednesday

  • Your ten best landscape photos adjusted in a contact sheet. Call this Landscape_adjusted_CS. Use cropping, color adjustments, brightness/contrast, burning/dodging, and clone stamping etc. to adjust your pictures.
  • Your best landscape picture. Send this to me as a JPEG file, not as a contact sheet

Shutter and F-Stop Example

http://www.photonhead.com/simcam/shutteraperture.php

http://www.kamerasimulator.se/eng/?page_id=2

Shutter and F-Stop Reading

http://cybercollege.com/tvp012.htm
http://www.picturecorrect.com/photographytips/208/aperture_fstops_camera_settings.htm

http://en.wikipedia.org/wiki/Aperture
http://en.wikipedia.org/wiki/F-number


F-Stops and Shutter Speed Hints

Please take detailed notes in your own words on the top two reading asignment. You will using the material you learn this week on the cameras.

Thursday, September 10, 2009

Digital Photo Quiz Tueday/Wednesday

There is a photo quiz next week that will ask you questions about camera composition. Study all reading and your notes.

Landscape Assignment


Your homework this weekend is to shoot landscape pictures. These pictures are due Monday.

You will shoot at least 24 pictures from at least two separate locations.
You may shoot horizontal and vertical landscape pictures.

Please do not center the horizon line and try to show something in the foreground, mid-ground, and background.

The image “http://akvis.com/img/examples/sketch/photo-on-sketch/landscape-photo.jpg” cannot be displayed, because it contains errors.

http://i45.photobucket.com/albums/f93/pospisil/landscape.jpg

Tuesday, September 08, 2009

Classwork and Homework Tues and Wednesday

Reading and picture examples:
http://cybercollege.com/tvp024.htm
http://cybercollege.com/tvp025.htm
http://cybercollege.com/comp_ex2.htm

On Tuesday/Wednesday students will work during class time and at home on four pictures emphasizing the following composition elements:
Color Contrast
Balance Mass
Patterns
Leading the subject

Please use rule of thirds and remember that the subject should fill the frame. You will take anywhere from 30-40 pictures. However, you will only need to turn in your best four pictures for each composition.
Due Thursday/Friday: 16 total pics, four for each composition level.

How to create a Contact Sheet

  • Create a new folder on your desktop with your pictures.
  • Open Photoshop CS3.
  • Select File>Automate>Contact Sheet II
  • Select on Folder and choose the folder your created.
  • Make sure the image size is 8*10 inches.
  • The resolution should be 300.
  • Columns and rows will vary: 12 pictures = 3*4 and 24 pictures=5*5
  • Click OK.
  • File>Save as a jpeg

Drop contacts shet into the STAFF server period 3/6 and make sure you use the naming convention. Contact sheets and other assignments without the naming convention will not be graded.

Thursday, September 03, 2009

Reading: During Class and Homework

Class work and homework
This is not a writing intensive course, but there is some reading the first couple weeks of class.
Please take notes on the bold faced words as you read from the links below and make sure you take the quizzes at the end of each section. You will be shooting the various composition elements this weekend and next week. We will also have a quiz on this material as well.

Friday's Reading and Homework:

In class:
http://www.microsoft.com/windowsxp/using/digitalphotography/learnmore/composition.mspx

Homework:
http://photoinf.com/General/Geoff_Lawrence/Composition.html

Today you will shoot six pictures with six different subjects. Please shoot three Rule of Thirds shots and three Unique Angle shots. Your homework is to shoot three leading lines shots and three frame within a frame (using other objects to frame your subject) shots.

Due Tuesday/Wednesday: 12 INTERESTING shots using all four techniques described above.Some people will take 30-40 pictures for 12 good ones.
You do not have to shoot outside.

Make sure you read both sections above.


Due Wednesday/Thursday

  • Academic Plan
  • Out of Class Permission Slip
  • Classroom Expectations

Email Me Please

Send me an email to trent.mitchell@shorelineschools.org and answer the questions below. Also, please CC one or both parents or guardians on this email so I can contact them via email as needed.

First, make sure you you tell me your complete name. Also include Photo 3 or Photo 6 in the subject line.


1. Why did you sign up for this course?
2. What experience do you have with cameras?
3. What kind of camera do you have?
4. What kind of movies and TV shows do you like?
5. What kind of music do you listen to?
6. List two or three things I should know about you so I can help ensure you do well in this class.

Thursday, June 18, 2009

Export your slideshow to Quicktime and turn it in.

Exporting and dropping to Vidstore


Exporting From Flash to Quicktime

File>Export>Export Movie>Quicktime
Save it as full quality movie and use the naming convention. Save it in your movies folder.

Next, control-click on the file in your movies folder and select get info'. Please make sure that everything under details and ownerships and permissions is set to 'read-write'.

Next, log onto to Vidstore.shorelineschools.org and drop it in the period 5 or 6 folder.

name:scvideo
password:outback
SC Video Classes

Last Assignment


Today we have a couple of tasks...

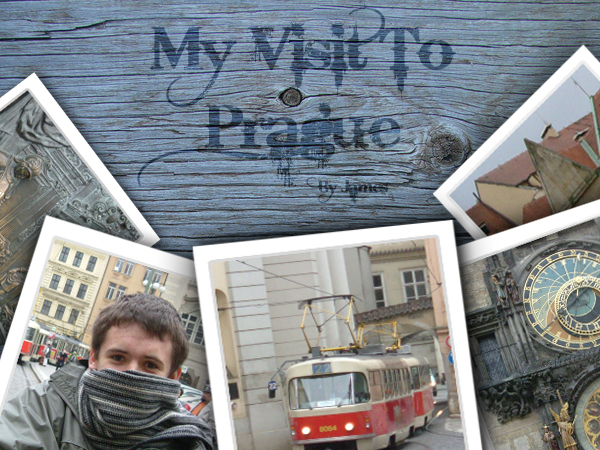
#1 You will be creating a collage of some of your best work from the semester and beyond. There are 4 ways you can do this:
  • following this tutorial for a pile of polaroids.
  • following this tutorial for an animated polaroid

Monday, June 15, 2009

Thursday, May 21, 2009

5/21 and 5/22 Turn in HDR. Also, send me your best pictures for the art show. We will matte these in class. Finally, complete and turn in your final project treatment.

5/26 and 5/27 All Day shooting for Final Project. Final Project Contact Sheet 1 due at the end of the period.

5/28 and 5/29 All Day shooting Day EXCEPT for seniors who skipped on 5/26. Seniors who skip must use class time to turn in photos and manipulate pictures. Shooting will be completed as home work.

6/1 Final Project Contact Sheet 2 is Due. All Day to edit/manipulate photos.

6/2 and 6/3 Editing and Printing. Final Project Contact Sheet 3 due at the beginning of the period.

6/4 and 6/5 Editing and Print All Day

6/8 No school.

6/9 and 6/10 Final Project Due For Seniors. Turn in all pictures used to STAFF folder period 5 and 6. Seniors will present project to class. Note: Final project will not be graded unless all 3 contact sheets are turned in.

6/11 and 6/12 Project Due For Underclassmen.

Photo Essay Treatment

Photo Essay Treatment

Please answer the following questions in complete sentences.

1. What is your theme for your final project?Example: My theme project is Old America.
2. Why did you choose this as your theme? Be specific. 1-2 sentences
3. What type of locations will you choose to shoot your pictures? Why? Keep in mind that you will need to leave campus and most likely leave Shoreline.
4. What type of pictures do you hope to take? Action, portrait, landscape etc? A good photo essay will have a variety.
5. What kind of composition will you focus on in your pictures? You will need at least five composition elements (not counting rule-of-thirds). Yes, I want to know what you are attempting before you shoot.
5b. How will your pictures convey emotion, either from your subject or from the viewer of the pictures?
6. How much work will be done at school and how much away from school?
7. If you don't have a car, how will you make sure you get to your locations? Can your parents help? How about public transit?
8. This project should showcase everything you have learned in Digital Photography. How will you ensure this happens? What adjustment techniques will you use?
9. Is there anything you are unclear about in terms of composition or shot styles and angles etc? This is the time to ask.
10. What type of camera or Photoshop experimentation will you try? HDR? Photomerge pictures? Aperture adjustments?

Please Answer these questions in detail(compete sentences)and send these questions to my staff folder, period five and six.
Next, please copy these questions to your email. Send the treatment to my email account. Please CC at least one of your parents or guardians on the email so they know they extent of this project. They may need to help with transportation.

The Photo Essay (Final Project)

Special Note: Seniors have one less class period to complete this assignment.


Assignment Requirements:

• First pick a general theme. For example, you might pick America, Democracy, or Responsibility. You will shoot photographs centered on this central theme. This may include camera experimentation like shutter speeds, HDR, aperture adjustments, or photomerges.

• Use what you've learned about photographic composition, lighting, color, lines, texture and use your camera to make a statement. Each individual photo will be graded accordingly. It is imperative you showcase your ability to shoot many angles of shots with many levels of camera composition (Review composition elements and types of shots if necessary).

• Your photographs should make both a visual and emotional/political/critical/intellectual statement. Your photo essay should contain at least 9 photographs. Below each picture you will also describe the composition elements used on each photo, what you did to adjust the picture, the photo settings used, why you picked this picture, and where you took the picture.

• Your photo essay should be something unique, new, and your own view of your selected theme.

A one-page reflection is also required. In this paper you need describe what you learned during your project. What did you learn about your subject, Photoshop, and photography in general. What was easy and difficult about your project? What would you do differently if you did it again? Finally, how far along do you think you have come as a photographer this semester?

• You can shoot B & W, Color, or both. It’s your artistic choice.

• You may digitally alter your photos as necessary in Photoshop.

• Your pictures should be printed out either 3*5 or 4*6, two to three pictures per page with the exception of one photo that will be printed at 8.5 *11.

• Projects should be turned in on poster board with written with the written reflection attached. Look at examples at the front of the room.

• You will also be dropping this assignment in my drop box so that we may view each project in front of the class.

Monday, May 18, 2009

HDR Assignement

HDR MERGE ASSIGNMENT

You will take a total of four sets of HDR pictures between today and Thursday/Friday. Each HDR Merge should have at least four different pictures (all with different shutter or aperture settings).

You will have class time on Tuesday/Wednesday so please bring your cameras. The rest of the pictures will be taken on your own time. I would like everyone to get at least one sunset or sun rise picture.
I recommend adjusting the shutter speed only or using full manual mode when using my cameras.

When you use your own cameras to get HDR pictures please adjust the different pre-selected settings to change light. For example, you could select snow, beach, cloudy, and sunny to get four different amounts of light into your camera. (These pre-selected settings adjust the aperture and shutter speed for you automatically).

HDR Pictures

Step-By-Step HDR Instruction

Here

In the instructions above they suggest you change your shutter speed instead of aperture. I will recommend you try both. I have created HDR pics adjustingthe aperture only adjustments and have had good results.

HDR Pictures


Each of these pictures is actually three pictures combined, each with a different aperture setting.

Friday, May 15, 2009

Stop Motion 2 Requirements and Treatment

1. 750-1000 pictures at least
2. An interesting animation where things that normally can't happen, happen.
3. Fade In/Out
4. Titles and Credits
5. Music throughout the whole video.
6. Multiple Sound effects
7. Two Separate Locations in your video (two scenes).
8. At least two objects must be animated.
9. Three storyboard sheets must be turned in per group.
10. Titles must be created in Live Type.

Treatment Questions (please use Text Edit and drop into the STAFF server):
1. What are you going to animate?
2. What is the story from beginning, middle, to end? Be specific. I want to know exactly what happens.
3. What will these objects do that will be interesting to watch?
4. What kind of music will you use?
5. What kind of sound effects will you use to enhance your video?
6.

Friday, May 08, 2009

Stop Motion Animation Requirements

1. 500-750 pictures at least
2. An interesting animation where things that normally can't happen, happen.
3. Fade In/Out
4. Titles and Credits
5. Music throughout the whole video.
6. Multiple Sound effects

You will export to Quicktime when you are finished and drop the video into the Vidstore server.

Tuesday, May 05, 2009

Studio Lighting Assignment


Studio Lighting!!! Your task is to shoot some interesting , creative and unique portraits using the studio lights.
Remember the different lighting techniques demonstrated in class. Use the lights to add emotion, feeling, or interesting shadows to your images.
Try to think out of the box, manipulate the image with Manual settings on the camera, blur motion, stop action, take tons of pics, and have FUN! Shoot for 1/2 the period in groups of 3 to 6 per light station.
Everyone should shoot their own photo session. Take turns as each others subjects. Shoot a minimum of 12 pictures per photographer. We will then edit them and make one fantastic using your photoshop skills.


Lighting Styles
http://www.fodors.com/focus/focselect.cfm?catid=7


Portait Assignment

You will shoot portraits during the same time frame as the studio lighting assignment. You can have Thurs/Fri and Tues/Wed to work on these assignments during class. One day you will shoot at school using the lights and the other day you will shoot off-campus. You can, and probably should, take pictures on the weekend as well.

1. Find two interesting human subjects. The people you choose should WANT to be in the picture and they should be willing to cooperate.
2. Talk to your subject. Use colors or lighting to create a concept for your portrait. Costumes or uniforms work great. Imaginary ideas are OK. Choose an interesting setting based on your concept.
3. Change angles between shots. Shoot at least 24 pictures of each subject.
4. Use props if they will help the audience learn something about the subject.
5. Vary the lighting. Use filters, flashlights, lamps, or multiple lights to enhance your picture. Use the different lighting techniques that you will read about in class (see above).
6. Encourage different emotional looks. Pretend you are Austin Powers taking pictures. Tell your subject they are "groovy".
7. Having your subjects "pose" in action is just fine.
8. Most importantly for this assignment don't forget your compostion rules. Use framing, leading lines, rule of thirds, color contrast etc. to enhance your photo. Fill the frame.

Portrait Hints

More Hints

Even more hints


Here is a list of the different types of portraits photos you will turn in:

  • A Vignette Photo
  • A Grayscale Method Photo
  • A One Item Kept in Color Photo
  • A selective Focus Photo
  • A minimally adjusted photo
  • One WHACKY anything goes portrait (change the colors, use the liquefy tool, and make this as unique and interesting as you can)

Finally, you will turn in your best picture as well.

Friday, May 01, 2009

Tutorial Web Sites

Youtube

http://www.pixel2life.com/

http://www.good-tutorials.com/

http://www.tutorialized.com/tutorials/Photoshop/1

Getting Started in Final Cut Pro

  1. Import Photos
  2. Put the photos in a folder and then onto the server for your classmates
  3. Grab Photos of the server
  4. Open Final Cut Pro
  5. Drag Pictures into the clip bin (upper left hand corner)
  6. Drag Pictures into timeline

  • Change the duration of the clips: highlight all of the clips, right click, select duration, and change the speed of the clips to 00:00:05 or 00:00:04. You decide on the speed.
  • Rendering: Apple R= Render Red and Control R=Render Green
  • Select your music.
  • Select your sound effects.
  • Drag all sounds into clip bin.

Thursday, April 30, 2009

What is due for the Color Picture Assignment?

  • Color Contact Sheet 2
  • 5 Color Adjustment Contact Sheet from web tutorials
  • Color Picture to Print

Sunday, April 26, 2009

Color Photos

  • Create your 20 picture contact sheet and turn it into the Staff server.
  • Edit, Crop, and adjust your pictures in the same manner as your abstracts.
  • Tuesday/Wednesday are color picture shooting days. Bring your cameras.

Stop Motion Pre-Production

Please get in your groups and start planning your production.

1. Please turn in the following information in the STAFF server:
  • Group Member names
  • A four to five sentence description of your animation project. Please tell me what special "tricks" you will create to make your animation look interesting. Also, let me know if you are using props or if the characters are wearing costumes. Most importantly please tell me the story from beginning to end.
2. Create a shot sheet. Write down the different shots you will take and the order you will take them. List the locations as well.
This will ensure you are prepared when you walk in the door Wednesday.
3. Create a storyboard of the first 15 frames.

Have fun!

Monday, April 20, 2009

Free Sounds!

http://www.freesound.org/

Remember, each sound should have it's own layer. Each sound should also have it's own keyframes with start/stop points.

Wednesday, April 15, 2009

Abstract Photo Assignment

For this assignment you will shoot all day Friday in class and the weekend. You need to shoot a minimum of 40 different objects in an abstract way.

Please look at the links below for examples of abstract work.
Googled

Earth Photography

Photo.net

123rf.com


For this next assignment I want you to throw out all of the "rules" we've discussed in class this semester. This is your chance to be as creative as possible. I would recommend looking for patterns, colors, and shapes when deciding on pictures to take. Also try to think of things you don't normally see pictures of.

Thursday, April 09, 2009

Create a comic of yourself. Be creative and turn one of your self portrait images into a cartoon or comic, add text or thought bubbles, make it funny, have a social commentary, tell a story etc.

http://a5.vox.com/6a00cd9782afdef9cc00d4142344256a47-500pi

tutorials for help:

turning your pic into a comic style:


adding text bubbles: