Simple Animation: http://www.youtube.com/watch?v=vXHicgeJxVw
Bouncing Ball http://www.youtube.com/watch?v=cfy4X8QG3HU
Neon Sign http://www.youtube.com/watch?v=eucvqSzRpTA&feature=related
Friday, January 27, 2012


Thursday, January 19, 2012
Updated FInal Project Info
Updated Final Project Schedule
Monday the 23th: Turn in Final Project CS2, Edit Pictures
Wednesday the 25th: Turn in Final Project CS3, Optional Shooting Day, Edit and Write Descriptions
Friday the 27th: Edit,Write Descriptions, and Print
Monday the 30th: Edit,Write Descriptions, and Print
Wednesday the 1st: Turn in Project in a binder or on Poster Board
Present Project to Class
Friday the 3rd: Present Project to Class
Monday the 23th: Turn in Final Project CS2, Edit Pictures
Wednesday the 25th: Turn in Final Project CS3, Optional Shooting Day, Edit and Write Descriptions
Friday the 27th: Edit,Write Descriptions, and Print
Monday the 30th: Edit,Write Descriptions, and Print
Wednesday the 1st: Turn in Project in a binder or on Poster Board
Present Project to Class
Friday the 3rd: Present Project to Class
Monday, January 09, 2012
Photo: Final Project Treatment
1. What is your theme for your final project?Example: My theme project is Old America, Photomerge Seattle, or Man v. Nature.
2. Why did you choose this as your theme? What is interesting about this theme? Be specific. 2-3 sentences
3. What type of locations will you choose to shoot your pictures? Why? Keep in mind that you will need to leave campus and most likely leave Shoreline. Please give three or four examples.
4. What type of pictures do you hope to take? Action, portrait, landscape etc? A good photo essay will have a variety. Give me some specific examples and how they relate to your theme. Yes, I want you to attempt to describe pictures you haven't even taken yet. Visualize...
5. What kind of composition will you focus on in your pictures? You will need at least five composition elements (not counting rule-of-thirds). Yes, again I want to know what you are attempting before you shoot. What will you try that you haven't done before?
5b. How will your pictures convey emotion, either from your subject or from the viewer of the pictures? Why will an audience really enjoy these pictures?
6. How much work will be done at school and how much away from school?
7. If you don't have a car, how will you make sure you get to your locations? Can your parents help? How about public transit?
8. This project should showcase everything you have learned in Digital Photography. How will you ensure this happens? What Photoshop adjustment techniques will you use? Please give three or four examples.
9. Is there anything you are unclear about in terms of composition or shot styles and angles etc? This is the time to ask.
10. What type of camera or Photoshop experimentation will you try? HDR? Photomerge pictures? Aperture adjustments? Shutter Speed work?
Please Answer these questions in detail(compete sentences)and send these questions to my staff folder, period 5.
Next, please copy these questions to your email. Send the treatment to my email account. Please CC at least one of your parents or guardians on the email so they know they extent of this project. They may need to help with transportation etc.
Digital Photo: The Final Project
Photo Eassy Requirements:
• First pick a general theme. For example, you might pick America, Democracy, or Responsibility. You will shoot photographs centered on this central theme. This may include camera experimentation like shutter speeds, HDR, aperture adjustments, or photomerges.
• Use what you've learned about photographic composition, lighting, color, lines, texture and use your camera to make a statement. Each individual photo will be graded accordingly. It is imperative you showcase your ability to shoot many angles of shots with many levels of camera composition (Review composition elements and types of shots if necessary).
• Your photographs should make both a visual and emotional/political/critical/intellectual statement. Your photo essay should contain at least 9 photographs. Below each picture you will also describe the composition elements used on each photo, what you did to adjust the picture, the photo settings used, why you picked this picture, and where you took the picture.
• Your photo essay should be something unique, new, and your own view of your selected theme.
A one-page reflection is also required. In this paper you need describe what you learned during your project. What did you learn about your subject, Photoshop, and photography in general. What was easy and difficult about your project? What would you do differently if you did it again? Finally, how far along do you think you have come as a photographer this semester?
• You can shoot B & W, Color, or both. It’s your artistic choice.
• You may digitally alter your photos as necessary in Photoshop. You should use all of the landscape style, portrait style, and Instagram styles as needed.
• Your pictures should be printed out either 3*5 or 4*6, two to three pictures per page with the exception of one photo that will be printed at 8.5 *11.
• Projects should be turned in on poster board or in a binder with written with the written reflection attached. Look at examples at the front of the room.
• You will also be dropping this assignment in my drop box so that we may view each project in front of the class.
Timeline:
Friday January 13th: Shooting Day 1
Wednesday January 18: Adjustment Day
Friday January 20: Shooting Day 2
Monday January 23: Adjustment Day
Wednesday January 25: Optional Shooting Day, Adjustment, Writing, and Printing Day
January 27: Adjustment, Writing, and Printing Day
January 30: Projects are due at the beginning of the period.
Friday, January 06, 2012
Self Portrait Adjustments
24 Total Adjustments
- 6 "Anything You Want Except Instagram" Adjustments
- 4 Grayscale Adjustments using the specific methods you learned in class
- 2 One or more items left in color
- 2 Super Cropped Pictures
- 2 Super Color Enhanced or Hyper Color (Vivid color)
- 8 Instagram Adjustment Actions
Wednesday, January 04, 2012
Stop Motion 2 Pre-Production
Please get in your groups and start planning your production.
1. Please use TEXT EDIT and turn in the following information in the STAFF server:
1. Please use TEXT EDIT and turn in the following information in the STAFF server:
- Group Member names
- A four to five sentence description of your animation project.
- Please tell me what items or items you will be bringing in on Friday to animate.
- Most importantly, please tell me the story from beginning to end.
- What type of music will you use? Why?
- What kind of sound effects will you add?
1. Fade In/Out
2. Titles
3. Credits
4. Music and sound effects throughout the entire animation project.
Monday, December 19, 2011
Self Portrait Assignment Over Break


You will shoot four different self-portraits over break. You need to pick four photo types from the following five categories.
1. A self-portrait where color is emphasized. Color may include wardrobe, location, props, or natural objects. Think of your picture as a one or two color concept picture.
2. A picture that emphasizes lighting and shadows. This will be a grayscale self-portrait.
3. A self-portrait that showcases your interests and hobbies. In this picture we learn what you like to do away from school. Think about what interests you and transfer that into a photo.
4. A fantasy self-portrait.
Dress up and use costumes. In this self-portrait you can use Photoshop
to enhance your picture in any way, shape, or form. Transfer yourself
to Hawaii or become a Viking like you have always wanted.
5. The Supermodel self-portrait. Dress up like a GQ or Cosmopolitan magazine model. This can be a grayscale or color picture. You will use Photoshop to airbrush and enhance this photo.

More ideas
Even more ideas
Video tip: http://www.youtube.com/watch?v=EvRtSh9rfpY&feature=related
Sunday, December 11, 2011
Editing Your Portraits: Photoshop "Vintage" actions
You will edit 16 of your Portrait photos. Please use at least 7 of the "vintage" style adjustments listed below. Please make sure you save your work using the "vintage" name at the end. On Tuesday the 20th please turn in a Portraits Adjusted CS along with your Best Picture (this pictures might NOT be the one in the display case).
Article: Why We Love Instagrams from Macworld
Photoshop Actions:
"Nashville" Instagram Tutorial
Instagram Video Tutorial
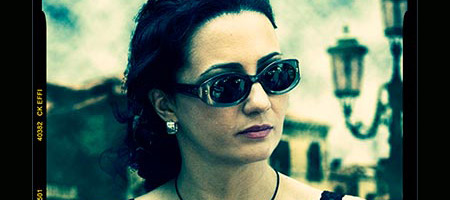
Cross processed photographs are recognisable from the unusual colours and tones in the final shot. The effect was originally produced from developing the photographic film using the wrong mix of chemicals. Nowadays, a cross processed style can be simply achieved in just a few steps. Photoshop Support shows us how.
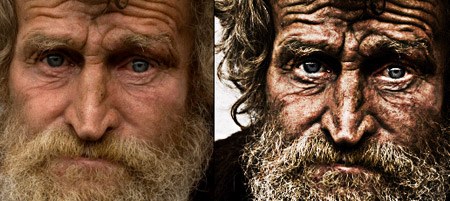
One of the most recognisable street photography shots is ‘Homeless Mike’ by Leroy Skalstad. The gritty, high contrast style of the image really emphasises the nature of street life. Recreate a similar image with this Dramatic Gritty Effect by Photoshop Frenzy.

The Russian made Lomo LC-A camera was manufactured a cheap alternative to the higher quality Japanese rivals. It was poorly made and the photographs it produced were just as bad, however as time passed popular culture brought the mis-coloured shots from the Lomo camera into a whole new light, which is now a very sought after effect. Not everyone has the opportunity of trying out the original camera model, but Digital Photography School has some great tips on mimicking the effect in Photoshop.
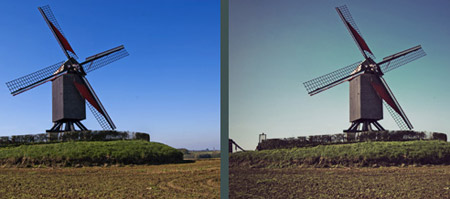
With limited technology the early colour photographs often had poor colour reproduction, with shots having an obvious colour casts and inaccurate tones. Today the effect can transform a photograph, instantly sending it back in time to give the impression of an aged effect. Veerle takes us through some techniques for producing a vintage style photo using a few simple Photoshop tweaks.
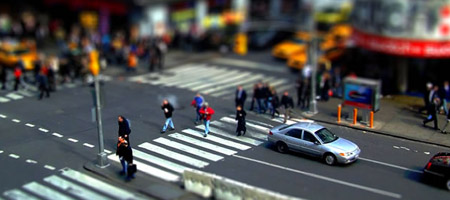
Tilt Shift is a photographic technique where the image plane is rotated, giving a very shallow depth of field but maintaining sharpness in a specific area of the shot. One of the popular post processing effects related to tilt shift photography is known as miniature faking, where the depth of field manually added to a shot gives the illusion of tiny model figures and sceneries. TiltShiftPhotography.net has this fantastic overview of creating the effect yourself.
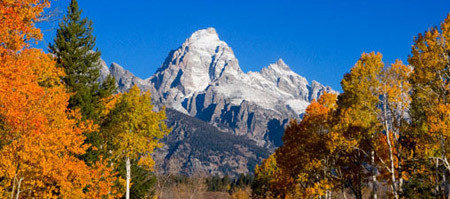
Fujifilm Velvia film created highly saturated, largely contrasting and extremely sharp images, which made it particularly popular with nature and landscape photographers. PSHero takes a look at using modern day Photoshop techniques to recreate the Velvia effect.
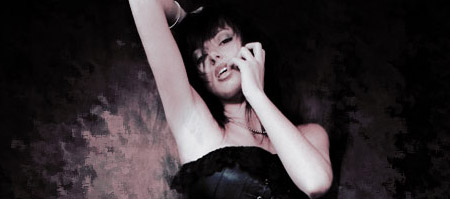
The term grunge has evolved from the music genre also known as Seattle Sound, characterized by stripped down sounds and heavily distorted guitars. The term grunge also made its way into photo post processing, where the key features are muted colours and large areas of texture and grain. PSHero has this excellent tutorial for creating your own dark grunge photo effect.
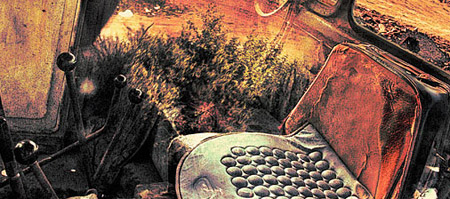 http://still-scripts.com/photoshop/faking-the-hdr-effect-using-only-one-photo-and-photoshop/
High Dynamic Range Imaging is a photography technique that produces an image with a much larger range of luminance between the darkest and lightest areas, making it much closer to the spectrum seen by the human eye. More recently the effect has been pushed to the max, with heavy tone mapping producing an abstract and highly stylised photo effect. The genuine effect is created with various RAW images and processing software, but the Nill Photoalbum has this great tutorial for producing a similar style directly in Photoshop.
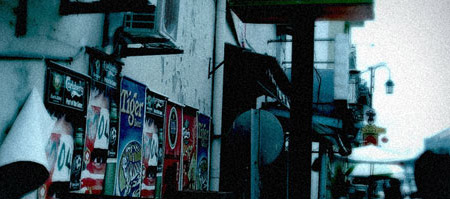
Alongside post processing, the video filming of movies often involves a range of camera filters. Ebin has this fantastic tutorial for creating a polished movie-like effect complete with diffusion glow and temperature tweaks in Photoshop.
Article: Why We Love Instagrams from Macworld
Photoshop Actions:
- http://webdesignledger.com/freebies/40-vintage-and-retro-photoshop-actions
- http://designm.ag/resources/photoshop-actions-touchups/
- http://blog.templatemonster.com/2011/01/20/35-vintage-photoshop-actions/
"Nashville" Instagram Tutorial
Instagram Video Tutorial
Cross Processing
Cross processed photographs are recognisable from the unusual colours and tones in the final shot. The effect was originally produced from developing the photographic film using the wrong mix of chemicals. Nowadays, a cross processed style can be simply achieved in just a few steps. Photoshop Support shows us how.
Street Photography
One of the most recognisable street photography shots is ‘Homeless Mike’ by Leroy Skalstad. The gritty, high contrast style of the image really emphasises the nature of street life. Recreate a similar image with this Dramatic Gritty Effect by Photoshop Frenzy.
Lomo Photography
The Russian made Lomo LC-A camera was manufactured a cheap alternative to the higher quality Japanese rivals. It was poorly made and the photographs it produced were just as bad, however as time passed popular culture brought the mis-coloured shots from the Lomo camera into a whole new light, which is now a very sought after effect. Not everyone has the opportunity of trying out the original camera model, but Digital Photography School has some great tips on mimicking the effect in Photoshop.
Vintage Photo Effect
With limited technology the early colour photographs often had poor colour reproduction, with shots having an obvious colour casts and inaccurate tones. Today the effect can transform a photograph, instantly sending it back in time to give the impression of an aged effect. Veerle takes us through some techniques for producing a vintage style photo using a few simple Photoshop tweaks.
Tilt Shift Photography
Tilt Shift is a photographic technique where the image plane is rotated, giving a very shallow depth of field but maintaining sharpness in a specific area of the shot. One of the popular post processing effects related to tilt shift photography is known as miniature faking, where the depth of field manually added to a shot gives the illusion of tiny model figures and sceneries. TiltShiftPhotography.net has this fantastic overview of creating the effect yourself.
The Velvia Effect
Fujifilm Velvia film created highly saturated, largely contrasting and extremely sharp images, which made it particularly popular with nature and landscape photographers. PSHero takes a look at using modern day Photoshop techniques to recreate the Velvia effect.
Dark Grunge Photo Effect
The term grunge has evolved from the music genre also known as Seattle Sound, characterized by stripped down sounds and heavily distorted guitars. The term grunge also made its way into photo post processing, where the key features are muted colours and large areas of texture and grain. PSHero has this excellent tutorial for creating your own dark grunge photo effect.
HDR Photography
http://still-scripts.com/photoshop/faking-the-hdr-effect-using-only-one-photo-and-photoshop/High Dynamic Range Imaging is a photography technique that produces an image with a much larger range of luminance between the darkest and lightest areas, making it much closer to the spectrum seen by the human eye. More recently the effect has been pushed to the max, with heavy tone mapping producing an abstract and highly stylised photo effect. The genuine effect is created with various RAW images and processing software, but the Nill Photoalbum has this great tutorial for producing a similar style directly in Photoshop.
Movie Photo Effect
Alongside post processing, the video filming of movies often involves a range of camera filters. Ebin has this fantastic tutorial for creating a polished movie-like effect complete with diffusion glow and temperature tweaks in Photoshop.
Wednesday, December 07, 2011
Photo Journalism Spreadsheet Links
Club pics:
https://docs.google.com/spreadsheet/ccc?key=0AkFAOIq5EPpndHhyUnVkR3BGbEJ4OFJ1T3BiOWJoX1E
Winter Sports:
https://docs.google.com/spreadsheet/ccc?key=0AkFAOIq5EPpndHlVOGpWMEl0OVpyYXFqanJHTEhfZ3c
Organizations:
https://docs.google.com/spreadsheet/ccc?key=0AnZsoHxFFrvGdHJJUlZJMWNfVzFRcHJ0cjRONVgzMlE
Performing Arts:
https://docs.google.com/document/d/1CYHO_fh27I19RcEBCC_zbZNxYyAafw_kCZ54MkPAoGY/edit
Original List:
https://docs.google.com/spreadsheet/ccc?key=0AkFAOIq5EPpndE1kcE80QlVTX0EyOFZTWlMyTWFjeXc
https://docs.google.com/spreadsheet/ccc?key=0AkFAOIq5EPpndHhyUnVkR3BGbEJ4OFJ1T3BiOWJoX1E
Winter Sports:
https://docs.google.com/spreadsheet/ccc?key=0AkFAOIq5EPpndHlVOGpWMEl0OVpyYXFqanJHTEhfZ3c
Organizations:
https://docs.google.com/spreadsheet/ccc?key=0AnZsoHxFFrvGdHJJUlZJMWNfVzFRcHJ0cjRONVgzMlE
Performing Arts:
https://docs.google.com/document/d/1CYHO_fh27I19RcEBCC_zbZNxYyAafw_kCZ54MkPAoGY/edit
Original List:
https://docs.google.com/spreadsheet/ccc?key=0AkFAOIq5EPpndE1kcE80QlVTX0EyOFZTWlMyTWFjeXc
NBC News Segment on Social Experiment
Visit msnbc.com for breaking news, world news, and news about the economy
Thursday, December 01, 2011
Digital Photography: Portrait Assignment
You will shoot portraits over the next two weeks on Friday Dec. 9 and Wednesday Dec. 14. One
day you will shoot at school using the lights in the studio and the other day you will
shoot off-campus at a predetermined location. You will shoot AT LEAST 24 pictures of your subject each day (most of you will shoot between 50 and 75 pictures.
You can, and probably should, take pictures on the
weekend as well.
1. Find two interesting human subjects. The people you choose should WANT to be in the picture and they should be willing to cooperate. It's OK to work with people in this class.
2. Talk to your subject. What type of portraits do you want to create? Use colors or lighting to create a concept for your portrait. Costumes or uniforms work great. Imaginary ideas are OK. Choose an interesting setting based on your concept.
3. Change angles between shots. Shoot at least 24 pictures of each subject.
4. Use props if they will help the audience learn something about the subject.
5. Vary the lighting. Use filters, flashlights, lamps, or multiple lights to enhance your picture. Use the different lighting techniques that you will read about in class (see above).
6. Encourage different emotional looks. Pretend you are Austin Powers taking pictures. Tell your subject they are "groovy".
7. Having your subjects "pose" in action is just fine.
8. Most importantly for this assignment don't forget your compostion rules. Use framing, leading lines, rule of thirds, color contrast etc. to enhance your photo. Fill the frame.
Portrait HintsPart 1
Portrait Hints Part 2
More Hints
Even more hints
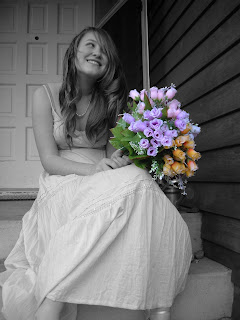
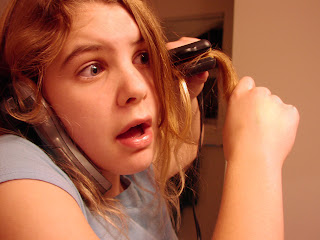
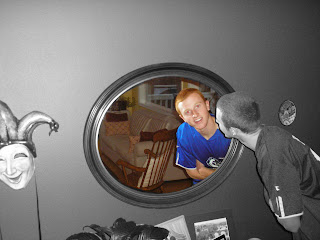
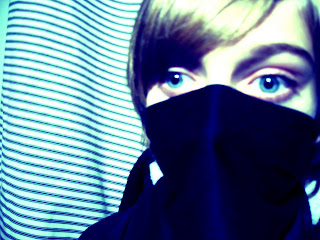
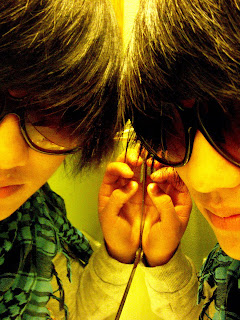
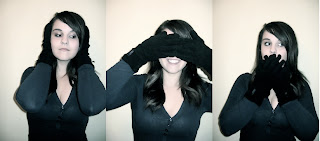
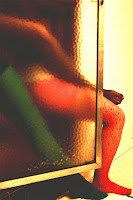
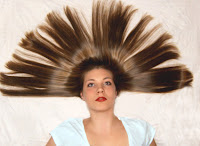
Here is a list of the different types of portraits photos you will turn in:
Finally, you will turn in your best picture as well.
Lighting!!!1. Find two interesting human subjects. The people you choose should WANT to be in the picture and they should be willing to cooperate. It's OK to work with people in this class.
2. Talk to your subject. What type of portraits do you want to create? Use colors or lighting to create a concept for your portrait. Costumes or uniforms work great. Imaginary ideas are OK. Choose an interesting setting based on your concept.
3. Change angles between shots. Shoot at least 24 pictures of each subject.
4. Use props if they will help the audience learn something about the subject.
5. Vary the lighting. Use filters, flashlights, lamps, or multiple lights to enhance your picture. Use the different lighting techniques that you will read about in class (see above).
6. Encourage different emotional looks. Pretend you are Austin Powers taking pictures. Tell your subject they are "groovy".
7. Having your subjects "pose" in action is just fine.
8. Most importantly for this assignment don't forget your compostion rules. Use framing, leading lines, rule of thirds, color contrast etc. to enhance your photo. Fill the frame.
Portrait HintsPart 1
Portrait Hints Part 2
More Hints
Even more hints


Here is a list of the different types of portraits photos you will turn in:
- A Vignette Photo
- A Grayscale Method Photo
- A One Item Kept in Color Photo
- A selective Focus Photo
- A minimally adjusted photo
- One WHACKY anything goes portrait (change the colors, use the liquefy tool, and make this as unique and interesting as you can)
Finally, you will turn in your best picture as well.

http://mrstorydigiphoto.blogspot.com/2011/12/different-lighting-techniques.html
- Creating Killer Headshots: The Cheap Way! - David Griffin
- A quick start guide to the one light setup - David Griffin
- Back Lighting - Studio Lighting Setup - StudioLighting.net
- Paramount (Butterfly) Lighting - Studio Lighting Setup - StudioLighting.net
- Multiple Light Portrait Setup Hints - David E. Price
- Short Lighting - Studio Lighting Setup - StudioLighting.net
- Broad Lighting - Studio Lighting Setup - StudioLighting.net
Wednesday, November 30, 2011
Animation: Import Pictures into Final Cut
1. Make sure the pictures are on the server for your whole group to get.
2. Open Final Cut Pro
3. Go to Final Cut Pro>User Preferences
4. Select Editing>Change Still Frame Duration to 00:00:05
5. Go to File>Import>Import Folder> and select on your stop motion picture folder

 Final Cut Shortcuts:
Render Red=Command R
Render Green=Control R
Selection (move tool)=A
Razor Blade (cut clips)=B
2. Open Final Cut Pro
3. Go to Final Cut Pro>User Preferences
4. Select Editing>Change Still Frame Duration to 00:00:05
5. Go to File>Import>Import Folder> and select on your stop motion picture folder


Render Red=Command R
Render Green=Control R
Selection (move tool)=A
Razor Blade (cut clips)=B
Monday, November 28, 2011
Animation: Stop Motion Assignment
http://www.youtube.com/watch?v=AJzU3NjDikY
http://www.youtube.com/watch?v=MtbQ4J3RfQ8&feature=related
http://www.youtube.com/watch?v=2_HXUhShhmY&feature=related
http://www.youtube.com/watch?v=DKWdSCt4jGE
http://www.youtube.com/watch?v=qBjLW5_dGAM
http://www.youtube.com/watch?v=BpWM0FNPZSs&feature=related
http://www.youtube.com/watch?v=o2pvO-FEqq4&feature=related
http://www.youtube.com/watch?v=5m23bL9AqB0&feature=related
http://www.youtube.com/watch?v=cYhhfHYZa5s&feature=related
Stop Motion Pre-Production
Please get in your groups and start planning your production.
1. Please use TEXT EDIT and turn in the following information in the STAFF server:
- Group Member names
- A four to five sentence description of your animation project.
- Please tell me what special "tricks" you will create to make your animation look interesting. What will your characters do that they can't do in real life?
- Also, let me know if you are using props or if the characters are wearing costumes. Who will wear what outfits?
- Most importantly please tell me the story from beginning to end.
- What type of music will you use? Why?
- What kind of sound effects will you add?
3. Create a storyboard of the first 45 frames.
Each video will need:
1. Fade In/Out
2. Titles
3. Credits
4. Music and sound effects
Wednesday, November 23, 2011
Awkward Family Photos
Your homework over break is to create awkward family photos like those seen on http://awkwardfamilyphotos.com/ and https://gma.yahoo.com/photos/awkward-family-photos-thanksgiving-edition-slideshow/awkward-family-photos-thanksgiving-edition-photo-1384882875951.html


Wednesday, November 16, 2011
Friday and weekend Action Merges

Keep the camera in one spot, use a tripod, and capture a subject moving four or five times.
Do this five times in different spots at your selected location (25 pictures total).
You will merge the pictures on Monday (see below):
Suggestions for activity:
- Ice Skating
- Basketball
- Skateboarding
- Dancing
- Acting as a one-man band
- Gymnastics
- Soccer
- Tennis
Do the exact same assignment over the weekend.
Monday, November 14, 2011
Monday Homework
4 Landscape-style Photomerges are due on Wednesday.
Please take as many pictures as you need to catch up.
Please take as many pictures as you need to catch up.
Wednesday, November 09, 2011
Sequences
If you have overlap, use a layer mask

step by step

- import pictures
- auto align layers
- create a new black layer mask on your top layer (alt + click on the layer mask icon in the layer palette)
- paint in white over your subject (sometimes lowering the opacity will help you see where to paint.
- flatten image
- add shadows as needed
- save
Photomerge Static


Your assignment over the next five to six days:
You will shoot Photomerge. These are 3-5 pictures that overlap to show a wide landscape or cityscape.
Your three Landscape style Photomerges should be taken at three different locations preferably at different different times of day.
Use a tripod if possible. Remember to manually adjust the white balance or select something like "cloudy" or "sunny" on your camera.
Summary
- Three locations
- One Photomerge from each location
- make sure each Photomerge is taken at a different time


Monday, November 07, 2011
Action Photo Practice
Today you will shoot and turn in a full contact sheet of action
pictures. You should have 10-12 panning style pictures using shutter
speeds of around 1/20-1/60 and then 10-12 pictures of regular fast
shutter speeds (usually 1/500-1/2500).
Please review the motocross video with the Crocodile Hunter. The panning instruction starts at about 1:30.
Please review the motocross video with the Crocodile Hunter. The panning instruction starts at about 1:30.
Subscribe to:
Posts (Atom)