Go
Connect to Server
Staff
Connect
Guest
Connect
Staff
OK
Find my last name and drop your document/picture into my drop box.
Make sure your project is named and saved as a JPEG.
Tuesday, January 17, 2006


Blog Assignment
Ralph's email when you are done extremz@gmail.com.
The class website: http://coolmyx.blogspot.com/.
Please make sure you leave five detailed comments.
The class website: http://coolmyx.blogspot.com/.
Please make sure you leave five detailed comments.
Greeting Card Assignment
You will make a greeting card for a friend or family member.
This project will have two sides: a front with a mask layer and an inside with a graphic and text.
To remind yourself how to make mask layers please see 'create an image using layers' and 'add shapes to an image' in the Photoshop help tutorial section. There is also some good explanation under Tutorials>layers>masking layers.
Your card should be color coordinated in both design and text.
The front of your card should include at least four layers and it should also demonstrate your ability to create an interesting border, crop a photo or design, and create 'special' text.
This card should mean something to you so please take your time.
Greeting card examples:
http://www.smartdraw.com/examples/flyers-general/
Tips for writing the inside of you card:
Traditional cards are those using rhymed, metered poetry. The number of lines is generally divisible by four. Traditional verse is often done by a company's in-house staff ; however, there has been a recent upsurge in freelance contributions in this area. This is just a suggestion and not manditory.
This project will have two sides: a front with a mask layer and an inside with a graphic and text.
To remind yourself how to make mask layers please see 'create an image using layers' and 'add shapes to an image' in the Photoshop help tutorial section. There is also some good explanation under Tutorials>layers>masking layers.
Your card should be color coordinated in both design and text.
The front of your card should include at least four layers and it should also demonstrate your ability to create an interesting border, crop a photo or design, and create 'special' text.
This card should mean something to you so please take your time.
Greeting card examples:
http://www.smartdraw.com/examples/flyers-general/
Tips for writing the inside of you card:
Traditional cards are those using rhymed, metered poetry. The number of lines is generally divisible by four. Traditional verse is often done by a company's in-house staff ; however, there has been a recent upsurge in freelance contributions in this area. This is just a suggestion and not manditory.
Wednesday, January 11, 2006
Composition
Leading Lines
Selective Focus
Rule of Thirds
Framing (frame within a frame)
Depth of Field (fore-ground, mid-ground, background)
Color Contrast
Convey meaning through colors and tones
Shadows
Brightness/Contrast relationship
Odd number of objects
Every picture should have one major subject and each one should mean something to you.
Selective Focus
Rule of Thirds
Framing (frame within a frame)
Depth of Field (fore-ground, mid-ground, background)
Color Contrast
Convey meaning through colors and tones
Shadows
Brightness/Contrast relationship
Odd number of objects
Every picture should have one major subject and each one should mean something to you.
Tuesday, January 10, 2006
Blog Assignment
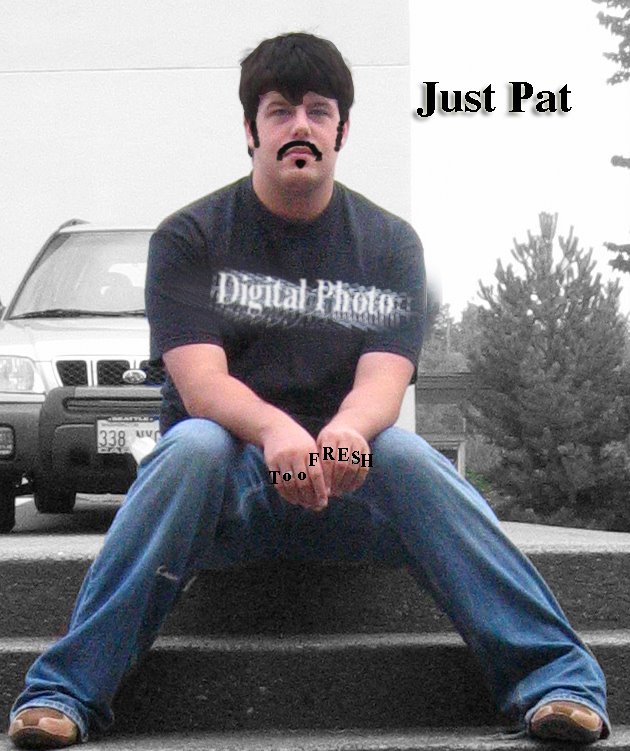
Here are the requirements for the blog assignment:
1. The colors you use on your blog should go with the template. In other words, don't clash. Everything should be easy to see and read.
2. Update your personal profile fully.
3. Add your picture to the profile. Use one of my cameras and then a card reader. Turn off camera before taking the card out. Put the Flash Card in the card reader and open Image Capture in the Applications Folder. Open Image Capture and select "Download Some". Select your picture and save it in the pictures folder. When you eject the card reader please drag it to the trash.
4. Add all of your work (everything). Beneath each example of your work please describe what you created in two-three sentences. Also, if you used a tutorial please locate it online and provide a link for that tutorial. The easy way to add your work is to save your project as a JPEG (save as) and then upload it to the website.
5. Add links to at least three tutorials you think other students would enjoy working on. Describe the tutorial in one-two sentences.
6. Throughout your website demonstrate that you can change text fonts, sizes, styles, and colors. Also, please demonstrate your ability to format text left, center, and right. Also, in at least one instance use the button or number formatting.7. Spell check your whole site.
8. Add links to three 'general interest" websites you think would interest other students. Add two to three sentences describing each link and explaining why you like the website.
9. A big portion of your grade is creativity. Make your site look "cool" and "original".
10. Add at least one more member to your blog.
11. Present a question on your blog that other students can answer.
11. You will send me a link to this site at the end of the day Thursday. You will also send your site to other students.
Monday, January 09, 2006
Digital Photo Photo Essay Treatment
Please answer the following questions in COMPLETE sentences and email your responses to trent.mitchell@shorelineschools.org.
In the subject line type Digital Photo. (very important)
1. What is your topic for the Photo Essay assignment?
2. Why do you think this is a good choice for you? What does the topic mean to you personally?
3. What specifically will you try to show with this assignment? For exampe, what types of pictures? Where will you shoot?
4. How much do you think you have improved in class since the beginning of the semester? How will your Photo Essay show this growth?
5. Have you thought about your aesthetic style for the assignment? For example, will it be all black and white or perhaps everything in vibrant colors? Will you try to incorporate shadows or brightness/contrast relationships? Please be specific and describe any ideas you might have.
In the subject line type Digital Photo. (very important)
1. What is your topic for the Photo Essay assignment?
2. Why do you think this is a good choice for you? What does the topic mean to you personally?
3. What specifically will you try to show with this assignment? For exampe, what types of pictures? Where will you shoot?
4. How much do you think you have improved in class since the beginning of the semester? How will your Photo Essay show this growth?
5. Have you thought about your aesthetic style for the assignment? For example, will it be all black and white or perhaps everything in vibrant colors? Will you try to incorporate shadows or brightness/contrast relationships? Please be specific and describe any ideas you might have.
Friday, January 06, 2006
Final Assignment
Final Project
Photo Essay Assignment
Digital Photography
Mr. Mitchell
Assignment Requirements:
• First pick a general theme. For example, you might pick America, Democracy, or Responsibility. You will shoot photographs centered on this central theme.
• Use what you've learned about photographic composition, lighting, color, lines, texture and use your camera to make a statement. Each individual photo will be graded accordingly. (Review composition elements if necessary).
• Your photographs should make both a visual and emotional/political/critical/intellectual statement. Your photo essay should contain at least 9 photographs. Below each picture you will also describe the composition elements used on each photo.
• Your essay should be something unique, new, and your own view of your selected theme.
• You can shoot B & W, Color, or both. It’s your artistic choice.
• You may digitally alter your photos as necessary in Photoshop.
• Each project will be accompanied by a two to three paragraph reflection on what you learned from this project both technically and emotionally. Also, you should explain any interesting information regarding your shot selection or process.
• Your pictures should be printed out either 3*5 or 4*6, two to three pictures per page with the exception of one photo that will be printed at 8.5 *11.
• Projects should be turned in on poster board with written with the written reflection attached.
• You will also be dropping this assignment in my drop box so that we may view each project in front of the class.
Photo Essay Assignment
Digital Photography
Mr. Mitchell
Assignment Requirements:
• First pick a general theme. For example, you might pick America, Democracy, or Responsibility. You will shoot photographs centered on this central theme.
• Use what you've learned about photographic composition, lighting, color, lines, texture and use your camera to make a statement. Each individual photo will be graded accordingly. (Review composition elements if necessary).
• Your photographs should make both a visual and emotional/political/critical/intellectual statement. Your photo essay should contain at least 9 photographs. Below each picture you will also describe the composition elements used on each photo.
• Your essay should be something unique, new, and your own view of your selected theme.
• You can shoot B & W, Color, or both. It’s your artistic choice.
• You may digitally alter your photos as necessary in Photoshop.
• Each project will be accompanied by a two to three paragraph reflection on what you learned from this project both technically and emotionally. Also, you should explain any interesting information regarding your shot selection or process.
• Your pictures should be printed out either 3*5 or 4*6, two to three pictures per page with the exception of one photo that will be printed at 8.5 *11.
• Projects should be turned in on poster board with written with the written reflection attached.
• You will also be dropping this assignment in my drop box so that we may view each project in front of the class.
Wednesday, January 04, 2006
Alternate Photo Assignment
Pick a photographer you would like to research.
In no LESS than one page please explain:
• Who you chose and who they are (i.e. when, where, what etc)
• Describe their photography (what is unique about her/his style and technique)
• And explain how he/she (or something they did, used or created) has impacted or changed photography.
Finally pick one of their photos to re-create.
ABBOTT
ANSEL ADAMS
ROBERT ADAMS
ALVAREZ BRAVO
ARBUS
ATGET
BELLOCQ
BLOSSFELDT
BOURKE-WHITE
BRANDT
BRASSAÏ
CALLAHAN
CAMERON
COBURN
CUNNINGHAM
DeCARAVA
DOISNEAU
EGGLESTON
EVANS
FENTON
FRIEDLANDER
GOWIN
GUTMANN
HILL&ADAMSON
HINE
KARSH
KERTÉSZ
KLEIN
KOUDELKA
LANGE
LARTIGUE
LAUGHLIN
LEVITT
MAPPLETHORPE
MEATYARD
MEYEROWITZ
MODEL
MODOTTI
MUYBRIDGE
NADAR
NEWMAN
O'SULLIVAN
OUTERBRIDGE
PARKS
PENN
RIIS
RODCHENKO
SALGADO
SHERMAN
SHORE
SMITH
SOMMER
STEICHEN
STIEGLITZ
STRAND
TALBOT
UELSMANN
WALDMAN
WATKINS
WEEGEE
WESTON
WHITE
WINOGRAND
WOLLEH
In no LESS than one page please explain:
• Who you chose and who they are (i.e. when, where, what etc)
• Describe their photography (what is unique about her/his style and technique)
• And explain how he/she (or something they did, used or created) has impacted or changed photography.
Finally pick one of their photos to re-create.
ABBOTT
ANSEL ADAMS
ROBERT ADAMS
ALVAREZ BRAVO
ARBUS
ATGET
BELLOCQ
BLOSSFELDT
BOURKE-WHITE
BRANDT
BRASSAÏ
CALLAHAN
CAMERON
COBURN
CUNNINGHAM
DeCARAVA
DOISNEAU
EGGLESTON
EVANS
FENTON
FRIEDLANDER
GOWIN
GUTMANN
HILL&ADAMSON
HINE
KARSH
KERTÉSZ
KLEIN
KOUDELKA
LANGE
LARTIGUE
LAUGHLIN
LEVITT
MAPPLETHORPE
MEATYARD
MEYEROWITZ
MODEL
MODOTTI
MUYBRIDGE
NADAR
NEWMAN
O'SULLIVAN
OUTERBRIDGE
PARKS
PENN
RIIS
RODCHENKO
SALGADO
SHERMAN
SHORE
SMITH
SOMMER
STEICHEN
STIEGLITZ
STRAND
TALBOT
UELSMANN
WALDMAN
WATKINS
WEEGEE
WESTON
WHITE
WINOGRAND
WOLLEH
Monday, December 05, 2005
Web Site to Download Illustrator Trial
http://www.adobe.com/support/downloads/product.jsp?product=27&platform=Macintosh
Click Adobe Illustrator CS2 tryout
Register/Log In
Remember your username and password
Click Adobe Illustrator CS2 tryout
Register/Log In
Remember your username and password
Wednesday, November 16, 2005
Photmerge Detailed Intructions
Photomerge
When you set up a Photomerge composition, you identify your source files, and then the assembly of the panorama is automatically done for you. Once the panorama is complete, you can still make changes to the placement of the individual photos, if necessary.
To set up a new Photomerge composition:
Do one of the following:
Choose File > Automate > Photomerge.
In the File Browser, select the images you want to use and then choose Automate > Photomerge from the File Browser menu bar (see Running automated tasks from the File Browser).
In the dialog box, choose an option from the Use pop-up menu:
Files to generate the Photomerge composition using individual files.
Folders to use all the images stored in a folder to create the Photomerge composition. The files in the folder appear in the dialog box.
Open Files to use the image files you have open in Photoshop.
Click the Browse button to navigate to the source files or folder you want to use to create the Photomerge composition. Select Attempt to Automatically Arrange Source Images if you want Photoshop to try to line the images up in their proper order. Deselect this option if you want to arrange the images in the lightbox yourself.
You can add more files by clicking the Browse button again and navigating to the source files. You can always remove a file from the Source Files list by selecting the file and clicking the Remove button.
When you've added all the source files, click OK to create the Photomerge composition. The source files will open automatically and will be processed.
If the composition can't be automatically assembled, a message appears on-screen. You can assemble the composition manually in the Photomerge dialog box using the lightbox. (See Using the Photomerge dialog box.)
Once the new panorama image appears in the Photomerge dialog box, you can work with individual source files and change your view of the work area. If you need to rearrange the order of the images, drag an image in the work area to reposition it, or rearrange the images in the light box (see Using the Photomerge dialog box).
If necessary, adjust the vanishing point or blending settings of your composition (see Changing Photomerge composition settings.)
If you'd like to save each image in the composition as individual layers, which is useful if you need to correct the color of each image separately, select Keep as Layers.
Do one of the following:
Click the OK button to generate the panorama as a new Photoshop file. The composition then opens in Photoshop.
Click the Save Composition As button to save the composition so you can open it again at a later time.
When you set up a Photomerge composition, you identify your source files, and then the assembly of the panorama is automatically done for you. Once the panorama is complete, you can still make changes to the placement of the individual photos, if necessary.
To set up a new Photomerge composition:
Do one of the following:
Choose File > Automate > Photomerge.
In the File Browser, select the images you want to use and then choose Automate > Photomerge from the File Browser menu bar (see Running automated tasks from the File Browser).
In the dialog box, choose an option from the Use pop-up menu:
Files to generate the Photomerge composition using individual files.
Folders to use all the images stored in a folder to create the Photomerge composition. The files in the folder appear in the dialog box.
Open Files to use the image files you have open in Photoshop.
Click the Browse button to navigate to the source files or folder you want to use to create the Photomerge composition. Select Attempt to Automatically Arrange Source Images if you want Photoshop to try to line the images up in their proper order. Deselect this option if you want to arrange the images in the lightbox yourself.
You can add more files by clicking the Browse button again and navigating to the source files. You can always remove a file from the Source Files list by selecting the file and clicking the Remove button.
When you've added all the source files, click OK to create the Photomerge composition. The source files will open automatically and will be processed.
If the composition can't be automatically assembled, a message appears on-screen. You can assemble the composition manually in the Photomerge dialog box using the lightbox. (See Using the Photomerge dialog box.)
Once the new panorama image appears in the Photomerge dialog box, you can work with individual source files and change your view of the work area. If you need to rearrange the order of the images, drag an image in the work area to reposition it, or rearrange the images in the light box (see Using the Photomerge dialog box).
If necessary, adjust the vanishing point or blending settings of your composition (see Changing Photomerge composition settings.)
If you'd like to save each image in the composition as individual layers, which is useful if you need to correct the color of each image separately, select Keep as Layers.
Do one of the following:
Click the OK button to generate the panorama as a new Photoshop file. The composition then opens in Photoshop.
Click the Save Composition As button to save the composition so you can open it again at a later time.
Tuesday, November 15, 2005
B-Movie Steps and Requirements
Steps for B-Movie Poster
1. Brainstorm and sketch ideas on paper. Show Mr. Mitchell your four ideas and pick one to work on.
2. Spend time to get any background/landscape pictures that you need. Pick a place that you could potentially have monsters climb on/destroy/reappear from/or live. Your poster must have at least one digital image taken with a camera.
3. Import your background photos and internet pictures to your computer.
4. Create a new document in Photoshop at 8.5 *11 inches with 200 resolution.
5. Add background photo to new document and import/download internet directly into project.
6. Manipulate photos to work within your poster.
7. Go to good-tutorials.com and pick a text to create that is appropriate for your poster. Text with blood, fire, or multiple colors also seem to work best. You will make text for your movie name as well as tag-lines and movie stars. The text should go well together.
7b. Check in with Mr. Mitchell to make sure everything is OK.
8. Once you have completed all of your poster you will need to merge layers and convert your picture to grayscale.
9. You will now paint your picture at approximately 23%-30% opacity. Pick colors that stand out.
10. Check in with Mr. Mitchell again and print.
Grading will be based on the following:
Creative movie title
Creative use of text effects for title and tag lines
Interesting/scary monster or villian
Use of digital image
Color Coordination
Realism of poster (does it look like something we would see in a theater)
Logo included
Movie details included in small print (directed by etc.)
Take your time on this project!
1. Brainstorm and sketch ideas on paper. Show Mr. Mitchell your four ideas and pick one to work on.
2. Spend time to get any background/landscape pictures that you need. Pick a place that you could potentially have monsters climb on/destroy/reappear from/or live. Your poster must have at least one digital image taken with a camera.
3. Import your background photos and internet pictures to your computer.
4. Create a new document in Photoshop at 8.5 *11 inches with 200 resolution.
5. Add background photo to new document and import/download internet directly into project.
6. Manipulate photos to work within your poster.
7. Go to good-tutorials.com and pick a text to create that is appropriate for your poster. Text with blood, fire, or multiple colors also seem to work best. You will make text for your movie name as well as tag-lines and movie stars. The text should go well together.
7b. Check in with Mr. Mitchell to make sure everything is OK.
8. Once you have completed all of your poster you will need to merge layers and convert your picture to grayscale.
9. You will now paint your picture at approximately 23%-30% opacity. Pick colors that stand out.
10. Check in with Mr. Mitchell again and print.
Grading will be based on the following:
Creative movie title
Creative use of text effects for title and tag lines
Interesting/scary monster or villian
Use of digital image
Color Coordination
Realism of poster (does it look like something we would see in a theater)
Logo included
Movie details included in small print (directed by etc.)
Take your time on this project!
Monday, November 14, 2005
B-Movie Link
http://www.go-star.com/antiquing/movieposters.htm
http://www.moderntimes.com/palace/b/bposter.htm
Also, go to google and do your own searches for ideas.
http://www.moderntimes.com/palace/b/bposter.htm
Also, go to google and do your own searches for ideas.
Wednesday, November 09, 2005
Tuesday, November 01, 2005
Activity Link
http://schools.shorelineschools.org/shorecrest/asb/index.php#activities
Pick your activity/advisor before class on Friday.
Pick your activity/advisor before class on Friday.
Tuesday, October 25, 2005
Printing
First adjust the brightness on your document about 15-20 (image>brightness and contrast) because our printer prints dark.
Next,
File>Print Preview
Select 'Select Scale to Fit Media' and 'Let Photoshop Determine Colors'
Select 'Page Setup' and select horizontal or vertical and click 'ok'
Select Print
Under Paper Type and Quality choose 'Glossy Paper'
Under Advanced pick 'maximum edge control' and 'Best Quality' Compression
Print
Next,
File>Print Preview
Select 'Select Scale to Fit Media' and 'Let Photoshop Determine Colors'
Select 'Page Setup' and select horizontal or vertical and click 'ok'
Select Print
Under Paper Type and Quality choose 'Glossy Paper'
Under Advanced pick 'maximum edge control' and 'Best Quality' Compression
SCNN Comedy Challenge Poster
You will make a poster that is 8.5 *11 inches and has 200 resolution.
The poster must contain a creative and orignal font and must be multi-colored.
Posters should be easy to read and conatain at least one border.
The poster needs to contain the following pieces of information:
SCNN Comedy Challenge
Turn in an edited 1:00 comedy video to Mr. Mitchell by December 9th
The top two videos will air on SCNN
(You can definitely enhance the poster with headlines or taglines like " Do you like to make people laugh" etc.)
Rules (small print)
Videos may be no longer or shorter than 1:00
Videos must be school appropriate
Videos should contain proper framing and editing techniques (no jump cuts)
You may use only 30 seconds of a "popular" song in your video
Mr. Story will come in and judge your posters next Tuesday. His top five posters will receive an automatic A and they will also be put on the walls around school.
Check out these websites for poster ideas:
http://www.concertposters.com/
http://www.bmasse.com/90s.html
http://www.bmasse.com/2004.htm
http://www.pearljam.com/posters.html (Click on small poster on left to view larger)
http://www.wolfgangsvault.com/catalog.aspx?PerformingArtistID=5107|11662|2395
The poster must contain a creative and orignal font and must be multi-colored.
Posters should be easy to read and conatain at least one border.
The poster needs to contain the following pieces of information:
SCNN Comedy Challenge
Turn in an edited 1:00 comedy video to Mr. Mitchell by December 9th
The top two videos will air on SCNN
(You can definitely enhance the poster with headlines or taglines like " Do you like to make people laugh" etc.)
Rules (small print)
Videos may be no longer or shorter than 1:00
Videos must be school appropriate
Videos should contain proper framing and editing techniques (no jump cuts)
You may use only 30 seconds of a "popular" song in your video
Mr. Story will come in and judge your posters next Tuesday. His top five posters will receive an automatic A and they will also be put on the walls around school.
Check out these websites for poster ideas:
http://www.concertposters.com/
http://www.bmasse.com/90s.html
http://www.bmasse.com/2004.htm
http://www.pearljam.com/posters.html (Click on small poster on left to view larger)
http://www.wolfgangsvault.com/catalog.aspx?PerformingArtistID=5107|11662|2395
Friday, October 21, 2005
CD Cover Assignment for Digital Photo
CD Assignment
You will create a front and back cover to insert into a blank CD case.
First you will open Photoshop and create two new blank documents. Both of these documents should be approximately 4.875 inches * 4.875 inches.
Front Cover:
• CD Name and Band Names in fonts of your choice from Good-Tutorials.com
• Fictional Band Name in font of your choice.
• Use your own pictures only. Every item on both covers must be something you took a picture of.
• An appropriate and well planned background if your picture is smaller than 4.875 inches. Gradients are always a nice option too for backgrounds.
Back Cover:
• Five pictures. Your five pictures can be band members playing music, singing, signing autographs, or you can make a collage (See The Beatles Sergeant Lonely Hearts Club Band or Revolver down below for good collage examples).
• Track List
• Copyright Information
• Well-designed background
Tools and Effects utilized from Photoshop:
Clone Stamp, Eyedropper, Selection Tools, Layering, Color Gradients, Adjusting Colors, Text Effects, cut/paste, and Free Transform etc.
http://porktornado.diaryland.com/albumcover.html
You will create a front and back cover to insert into a blank CD case.
First you will open Photoshop and create two new blank documents. Both of these documents should be approximately 4.875 inches * 4.875 inches.
Front Cover:
• CD Name and Band Names in fonts of your choice from Good-Tutorials.com
• Fictional Band Name in font of your choice.
• Use your own pictures only. Every item on both covers must be something you took a picture of.
• An appropriate and well planned background if your picture is smaller than 4.875 inches. Gradients are always a nice option too for backgrounds.
Back Cover:
• Five pictures. Your five pictures can be band members playing music, singing, signing autographs, or you can make a collage (See The Beatles Sergeant Lonely Hearts Club Band or Revolver down below for good collage examples).
• Track List
• Copyright Information
• Well-designed background
Tools and Effects utilized from Photoshop:
Clone Stamp, Eyedropper, Selection Tools, Layering, Color Gradients, Adjusting Colors, Text Effects, cut/paste, and Free Transform etc.
http://porktornado.diaryland.com/albumcover.html
Monday, September 26, 2005
CD Cover Assignment
CD Assignment
You will create a front and back cover to insert into a blank CD case.
First you will open Photoshop and create two new blank documents. Both of these documents should be approximately 4.875 inches * 4.875 inches.
Front Cover:
• CD Name in font of your choice from Good-Tutorials.com
• Fictional Band Name in font of your choice.
• Use your own pictures or pictures from the internet. Internet pictures must be at least 200 pixels.
• An appropriate and well planned background if your picture is smaller than 4.875 inches. Gradients are always a nice option too.
Back Cover:
• Five pictures. Your five pictures can be band members playing music, singing, signing autographs, or you can make a collage (See The Beatles Sergeant Lonely Hearts Club Band or Revolver down below for good collage examples).
• Track List
• Copyright Information
• Well-designed background
Tools and Effects utilized from Photoshop:
Clone Stamp, Eyedropper, Selection Tools, Layering, Color Gradients, Adjusting Colors, Text Effects, cut/paste, and Free Transform etc.
http://porktornado.diaryland.com/albumcover.html
You will create a front and back cover to insert into a blank CD case.
First you will open Photoshop and create two new blank documents. Both of these documents should be approximately 4.875 inches * 4.875 inches.
Front Cover:
• CD Name in font of your choice from Good-Tutorials.com
• Fictional Band Name in font of your choice.
• Use your own pictures or pictures from the internet. Internet pictures must be at least 200 pixels.
• An appropriate and well planned background if your picture is smaller than 4.875 inches. Gradients are always a nice option too.
Back Cover:
• Five pictures. Your five pictures can be band members playing music, singing, signing autographs, or you can make a collage (See The Beatles Sergeant Lonely Hearts Club Band or Revolver down below for good collage examples).
• Track List
• Copyright Information
• Well-designed background
Tools and Effects utilized from Photoshop:
Clone Stamp, Eyedropper, Selection Tools, Layering, Color Gradients, Adjusting Colors, Text Effects, cut/paste, and Free Transform etc.
http://porktornado.diaryland.com/albumcover.html
Subscribe to:
Posts (Atom)