Friday, January 30, 2015

Photo 2: Manual Camera Work for Monday


Manual Camera Work

·    Using Manual mode you are going take pictures of ten different interesting subjects with a shallow depth of field and deep depth of field. You CAN adjust the ISO for this assignment.
·    Adjust the Aperture and Shutter settings as needed.
·    The subject should be interesting to look at.
·    Pictures should be well lit and well composed. Frame should be filled.
·    Create a contact sheet with all 20 pictures (two for each subject)
·    Import your pictures and call the contact sheet “Manual CS.”

Item to remember: Bracketing is when you adjust the shutter or aperture in concert to produce a well focused and well lit picture.

Shallow depth of Field:


Deep depth of field:

Wednesday, January 28, 2015

Animation First Assignment

I would like you to visit YouTube and other websites and watch a variety of flash animation.

When you are done watching the animation (spend about 30-35 minutes or so on this) I would like you to tell me what your three favorite flash movies were and why you liked them.
Did you like the storyline? Animation style? Sound effects? Music?

Please list this information, along with the link to access the animation, in the comments section below.
Don't forget to put your name and class period at the beginning so I know you did your work.
Also, please include the link to the animation.
Please use headphones.

An example: https://www.youtube.com/watch?v=npTC6b5-yvM

Welcome to class! Don't forget to fill in the comment section with your favorite videos. Log in as anonymous and then write your name and class period at the top of your comment.
Mr. Mitchell

Monday, January 26, 2015

Digital Photo 2: Review Reading

Digital Photo 2: Review Reading 

Please take notes on anything that you cannot identify from memory.

http://www.trentsizemore.com/principles-of-design/principles/

http://photoinf.com/General/Robert_Berdan/Composition_and_the_Elements_of_Visual_Design.htm

(Take quizzes at the end of each section below)
http://cybercollege.com/tvp023.htm
Start reading at "Strive for Feeling of Unity"
http://cybercollege.com/tvp024.htm
http://cybercollege.com/tvp025.htm
 
We will discuss these terms before you go out shooting on Thursday.

Tuesday, January 20, 2015

Final Photography Assignments Due Thursday


Photography due on Thursday

Best Photomerge Final Photo as a jpeg
8 Photomerge Adjusted Contact Sheet as a jpeg

Three pictures of your choice for printing named:
  • Final Printing 1
  • Final Printing 2
  • Final Printing 3

Friday, January 16, 2015

Photomerge Contact Sheets Due So Far


·Photomerge Homework CS1
·Photomerge Classwork CS1

16-24 un-merged pictures per sheet

Thursday, January 08, 2015

Photomerge Assignment


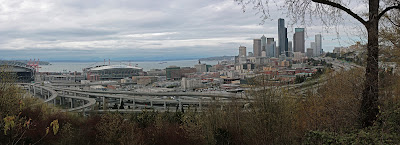
Your assignment over the next week is to take multiple  panorama style photomerges.  Take a picture and then move the camera slightly up or sideways to take another "connected" image. Basically you combine smaller pictures to make one larger picture.

Use a tripod if possible. Remember to manual adjust white balance or select something like "cloudy" or "sunny" on your camera.

Here is how you connect multiple pictures in Photoshop.

To set up a new Photomerge composition:
Do one of the following:
Choose File > Automate > Photomerge.
In the File Browser, select the images you want to use and then choose Automate > Photomerge from the File Browser menu bar
In the dialog box, choose an option from the Use pop-up menu:
  • Files to generate the Photomerge composition using individual files.
  • Folders to use all the images stored in a folder to create the Photomerge composition. The files in the folder appear in the dialog box.
  • Open Files to use the image files you have open in Photoshop.
Click the Browse button to navigate to the source files or folder you want to use to create the Photomerge composition. Select Attempt to Automatically Arrange Source Images if you want Photoshop to try to line the images up in their proper order.
Then edit your picture as you need.

Here is a tutorial you can use to get you going.
http://www.youtube.com/watch?v=qrNI-gAuI5s

Tentative schedule

Thursday/Friday: Practice at school up by the track,the front of the school or Hamlin. Take five different photomerges comprised of 3-5 pictures each.
Return to class at 11:45.
Merge your pictures in Photoshop using the directions above.

Weekend Homework: Go to one landscape location and shoot five different photomerges. This means you will shoot about 15-20 pictures
Monday/Tuesday: Off campus shooting
Wednesday/Thursday: editing