Wednesday, December 19, 2012

Self Portrait Assignment


"Self Portrait Assignment
The Art of Constructing a Self-Portrait
A self-portrait comes from within. Injecting 'those we love' into the portrait steers one away from the harder task to trying to reveal self without adornment.
If you eat, sleep, and live for speed then your self-portrait should reflect motion and movement as one of its cornerstones.
If you are a reflective type, then reflections and patterns and their intersections should occupy a primary space.
If overall you feel more flawed then whole, then you wouldn't want to go about photographing the most pristine parts of yourself; you would want, instead, to capture your essence in a manner that describes and defines you without complaining. I say that because the essence of self-discovery requires you to be a benign observer of self so as not to hone in too closely on this or that part.
A sense of 'wholeness' is difficult to capture at best. Indeed, wholeness is almost impossible for some people to even understand -- let alone capture in themselves -- because their persons and their lives are so fragmented, so disorganized in general.
But that is what self-portraiture is all about, capturing the whole -- the whole of who you are as a person.
Try to be unforgiving in a benign and neutral way. Study yourself in the mirror and paint what you see there. Then go inside yourself and paint what you see there."
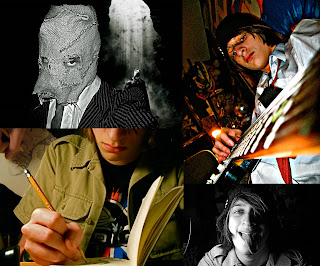
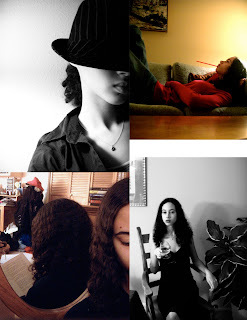
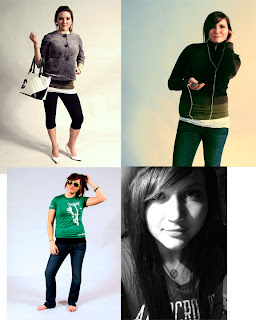
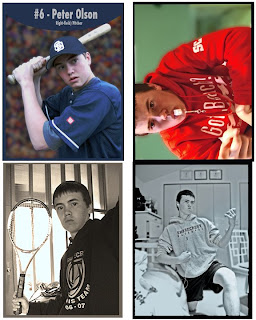
You will shoot four different self-portraits over break. You need to pick four photo types from the following five categories.
1. A self-portrait where color is emphasized. Color may include wardrobe, location, props, or natural objects. Think of your picture as a one or two color concept picture.
2. A picture that emphasizes lighting and shadows. This will be a grayscale self-portrait.
3. A self-portrait that showcases your interests and hobbies. In this picture we learn what you like to do away from school. Think about what interests you and transfer that into a photo.
4. A fantasy self-portrait. Dress up and use costumes. In this self-portrait you can use Photoshop to enhance your picture in any way, shape, or form. Transfer yourself to Hawaii or become a Viking like you have always wanted.
5. The Supermodel self-portrait. Dress up like a GQ or Cosmopolitan magazine model. This can be a grayscale or color picture. You will use Photoshop to airbrush and enhance this photo.


Hints for self-portraits:


Use colors or lighting to create a concept.

Costumes or uniforms work great.

Change angles.

Use props.

Vary the lighting.

Try different emotional looks.

Pose in action.

Most importantly for this assignment don't forget your composition rules. Use framing, leading lines, rule of thirds, color contrast etc. to enhance your photo. Fill the frame.
Tuesday, December 18, 2012

Text Tutorial for Sequence Assignment

Sequences

If you have overlap, use a layer mask

http://www.youtube.com/watch?v=ReDRMX2-8n4&NR=1&feature=fvwp

step by step

  • import pictures into Adobe Bridge
  • Export to Photoshop Layers: Tools>Photoshop>Load Files into Photoshop Layers
  • auto align layers in Photoshop
  • create a new black layer mask on your top layer (alt + click on the layer mask icon in the layer palette)
  • paint in white over your subject (sometimes lowering the opacity will help you see where to paint.
  • flatten image
  • add shadows as needed
  • save

Thursday, December 13, 2012

Photo 1: Sequence Assignment

Action Sequence Photography 25 Beautiful Examples of Action Sequence Photography
When you’re creating a sequence photo make sure you get all the action you need. This can be done by choosing the action setting on a DSLR. Make sure you have a camera that able to do high shutter speeds. A DSRL that can shoot 3-5fps can get you great results. Then set the camera up in a sturdy location or on a sturdy tripod so movement between frames is limited. Below are some truly amazing examples of sequence photography. The trick is to hold the camera steady and have the action move through multiple frames/photos:

Ray Demski


sports action 01  25 Beautiful Examples of Action Sequence Photography 

Examples

YouTube Sequence Tutorial 

Weekend Homework:
 Your goal is to shoot 7  sequences over the weekend with DRAMATIC action.  Pick sports or activities that are interesting a action packed.
 Make sure your shot is taken from a creative angle and demonstrates intense action. Each sequence should have 3-5 shots.
 

Tuesday, December 11, 2012

Editing Portraits

Editing Your Portraits: Photoshop "Vintage" actions

You will edit and turn in 18 of your Portrait photos. Please use at least 7 of the "vintage" style adjustments listed below.
Please make sure you save your work using the "vintage" name at the end along with the "Portrait Hint" that best matches your picture. For example, you might name your picture 4-Mitchellt-Lomo-Change-angle.
Make sure one picture has the hair colored.

 On Thursday the 13thth please turn in a Portraits Adjusted CS along with your Best Picture.

Article: Why We Love Instagrams from Macworld

Photoshop Actions:


"Nashville" Instagram Tutorial

Instagram Video Tutorial 

Cross Processing

Cross Processing
Cross processed photographs are recognisable from the unusual colours and tones in the final shot. The effect was originally produced from developing the photographic film using the wrong mix of chemicals. Nowadays, a cross processed style can be simply achieved in just a few steps. Photoshop Support shows us how.

Street Photography

Street Photography
One of the most recognisable street photography shots is ‘Homeless Mike’ by Leroy Skalstad. The gritty, high contrast style of the image really emphasises the nature of street life. Recreate a similar image with this Dramatic Gritty Effect by Photoshop Frenzy.

Lomo Photography

Lomo Photography
The Russian made Lomo LC-A camera was manufactured a cheap alternative to the higher quality Japanese rivals. It was poorly made and the photographs it produced were just as bad, however as time passed popular culture brought the mis-coloured shots from the Lomo camera into a whole new light, which is now a very sought after effect. Not everyone has the opportunity of trying out the original camera model, but Digital Photography School has some great tips on mimicking the effect in Photoshop.

Vintage Photo Effect

Vintage Photo Effect
With limited technology the early colour photographs often had poor colour reproduction, with shots having an obvious colour casts and inaccurate tones. Today the effect can transform a photograph, instantly sending it back in time to give the impression of an aged effect. Veerle takes us through some techniques for producing a vintage style photo using a few simple Photoshop tweaks.

Tilt Shift Photography

Tilt Shift Photography
Tilt Shift is a photographic technique where the image plane is rotated, giving a very shallow depth of field but maintaining sharpness in a specific area of the shot. One of the popular post processing effects related to tilt shift photography is known as miniature faking, where the depth of field manually added to a shot gives the illusion of tiny model figures and sceneries. TiltShiftPhotography.net has this fantastic overview of creating the effect yourself.


The Velvia Effect

The Velivia Effect
Fujifilm Velvia film created highly saturated, largely contrasting and extremely sharp images, which made it particularly popular with nature and landscape photographers. PSHero takes a look at using modern day Photoshop techniques to recreate the Velvia effect.

Dark Grunge Photo Effect

Grunge Photo Effect
The term grunge has evolved from the music genre also known as Seattle Sound, characterized by stripped down sounds and heavily distorted guitars. The term grunge also made its way into photo post processing, where the key features are muted colours and large areas of texture and grain. PSHero has this excellent tutorial for creating your own dark grunge photo effect.

HDR Photography

HDR Photographyhttp://still-scripts.com/photoshop/faking-the-hdr-effect-using-only-one-photo-and-photoshop/
High Dynamic Range Imaging is a photography technique that produces an image with a much larger range of luminance between the darkest and lightest areas, making it much closer to the spectrum seen by the human eye. More recently the effect has been pushed to the max, with heavy tone mapping producing an abstract and highly stylised photo effect. The genuine effect is created with various RAW images and processing software, but the Nill Photoalbum has this great tutorial for producing a similar style directly in Photoshop.

Movie Photo Effect

Movie Photo Effect
Alongside post processing, the video filming of movies often involves a range of camera filters. Ebin has this fantastic tutorial for creating a polished movie-like effect complete with diffusion glow and temperature tweaks in Photoshop.